Installation
Install via CocoaPods
-
Add pod to your project's podfile:
pod ScanzyBarcodeScannerSDK
-
Run command:
pod install --repo-update
Install Manually
-
Get ScanzyBarcodeScannerSDK from here.
-
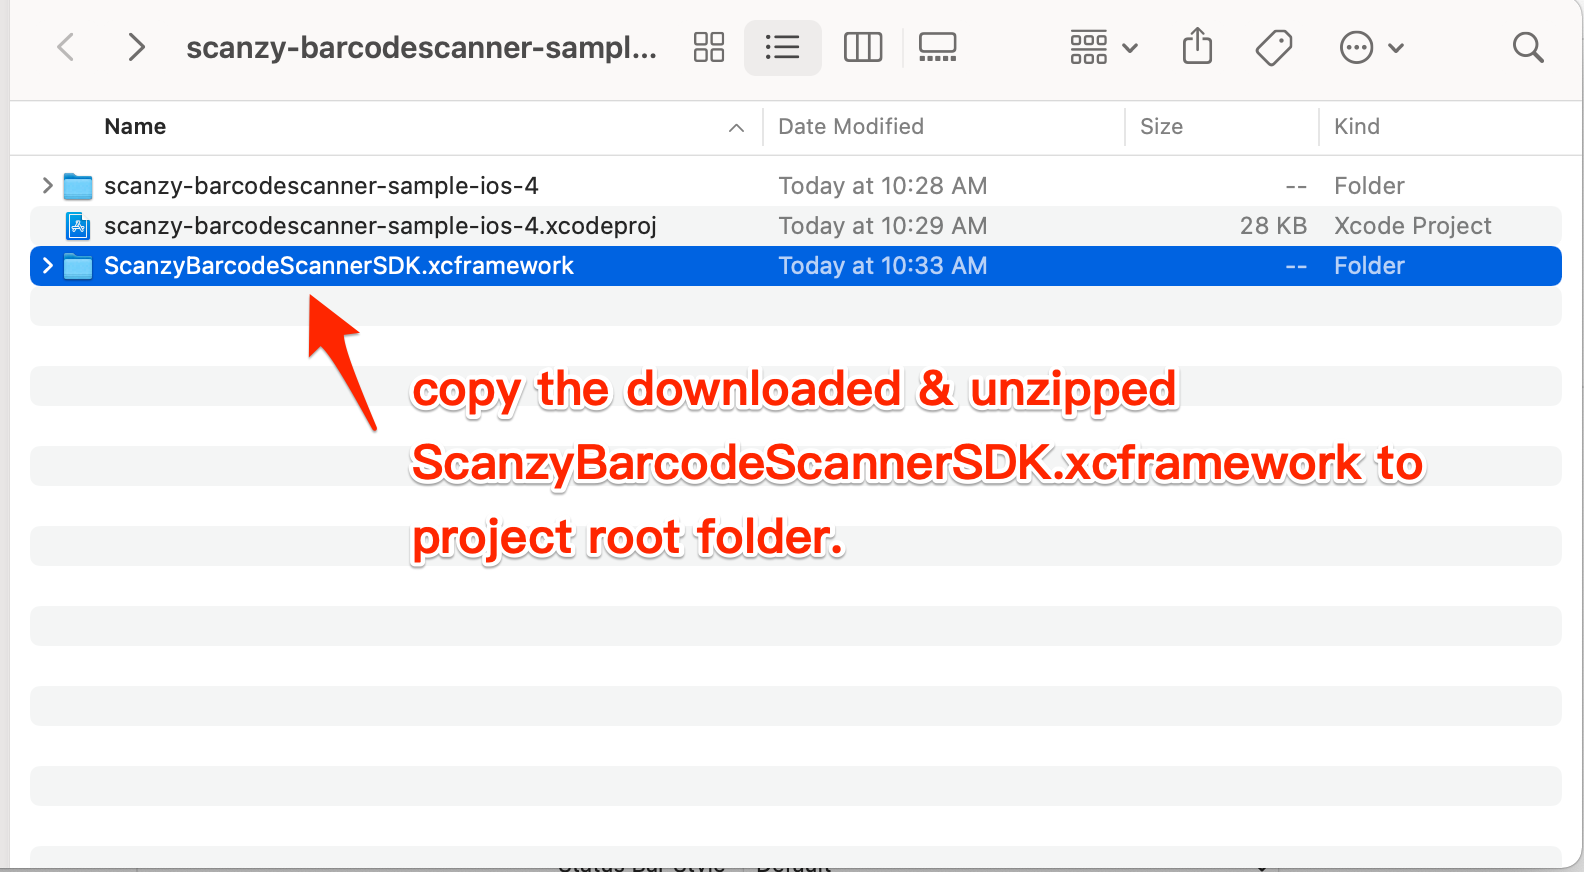
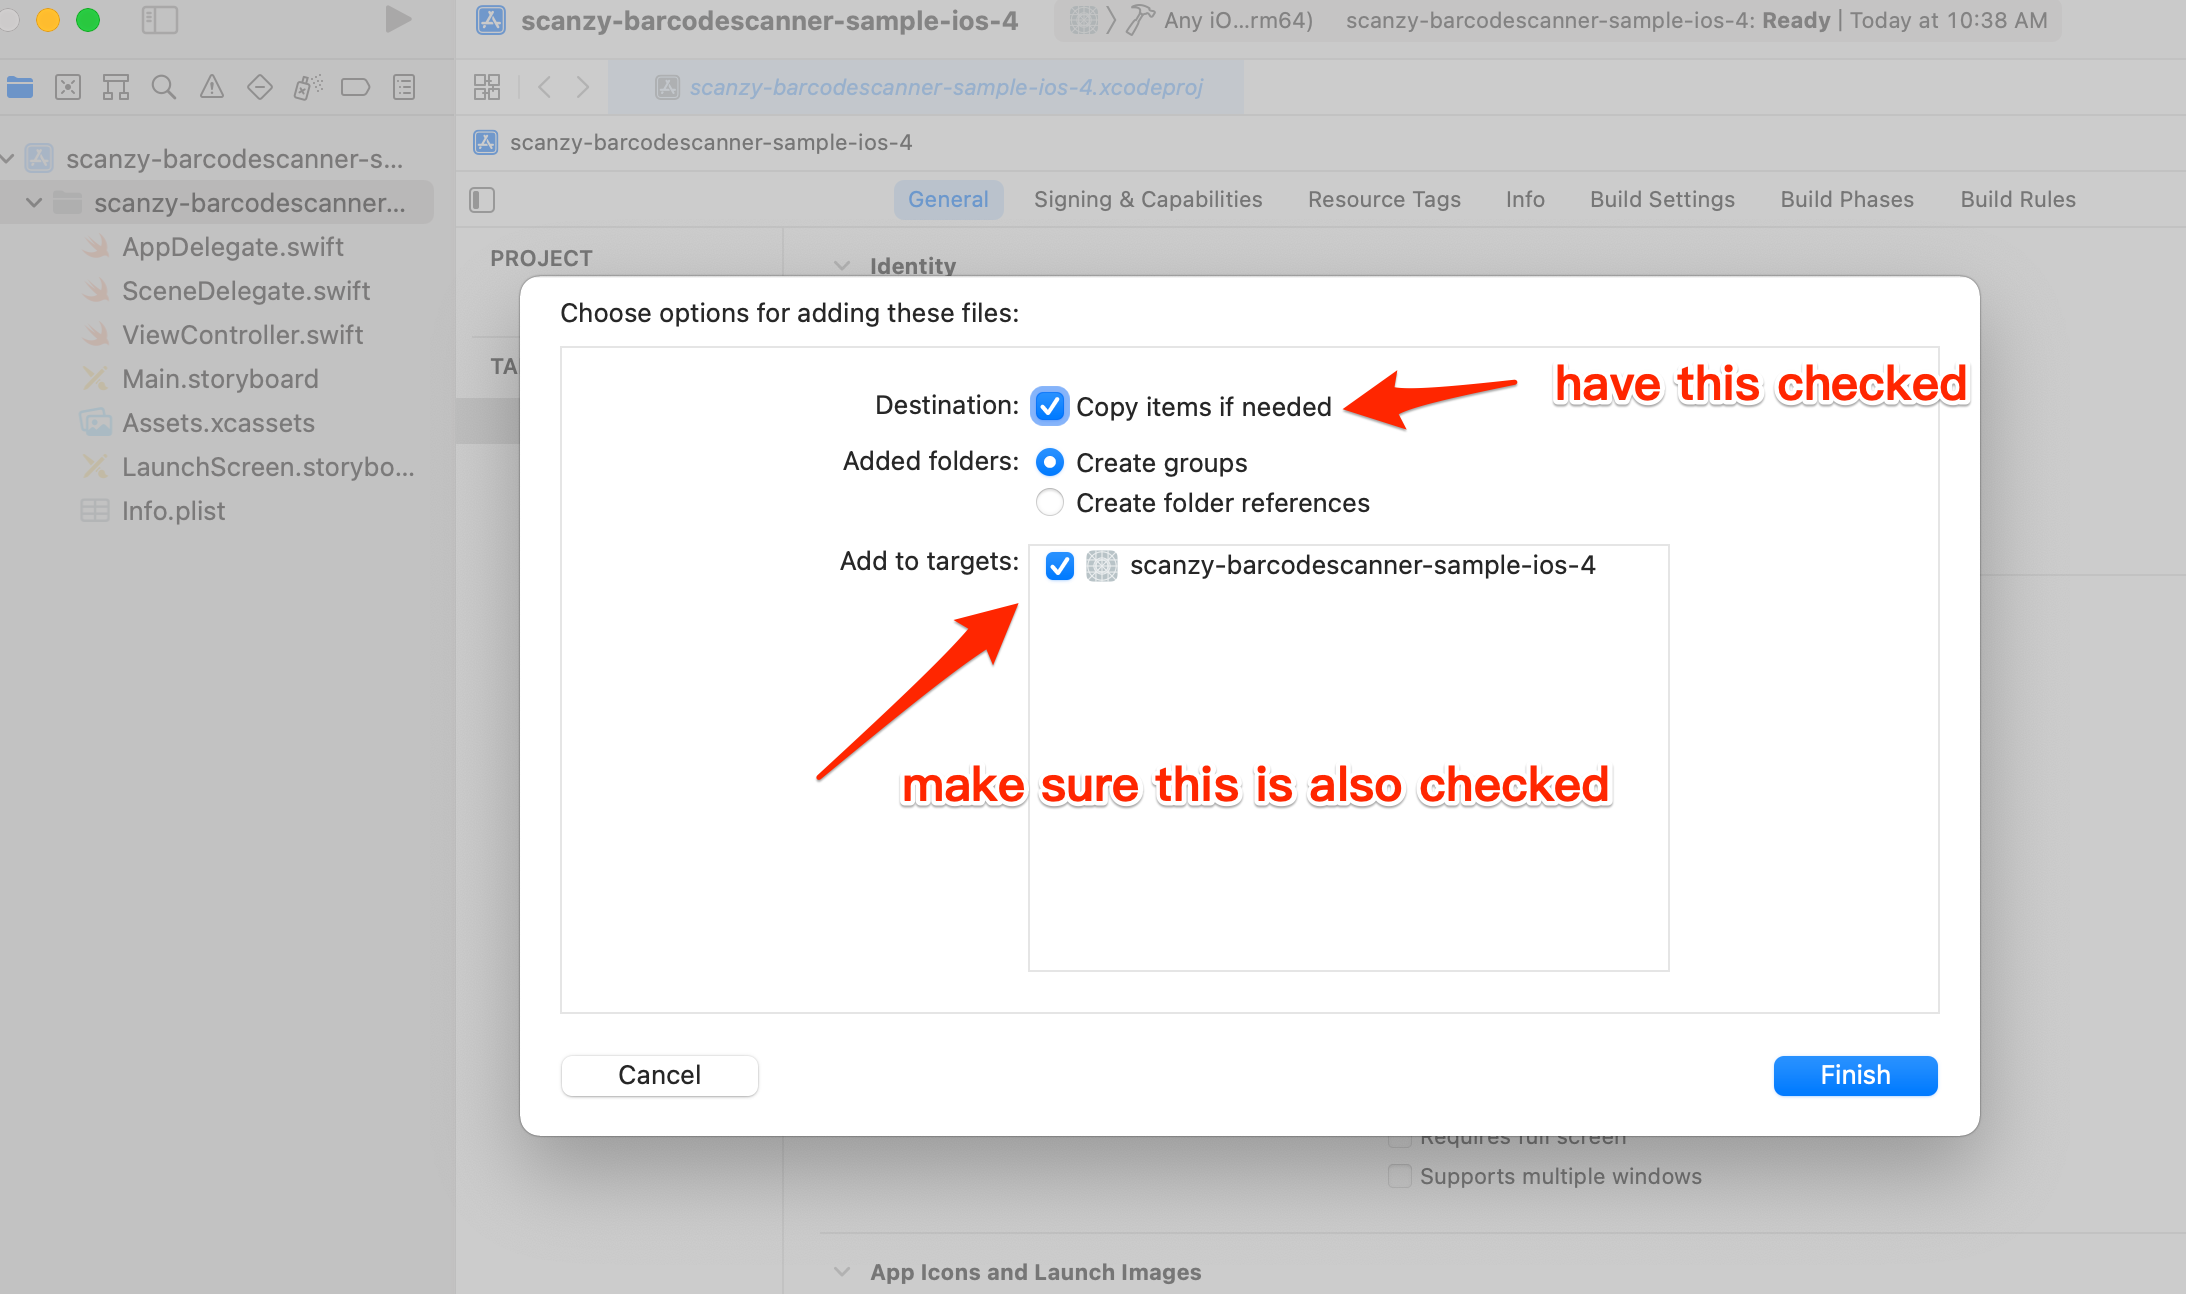
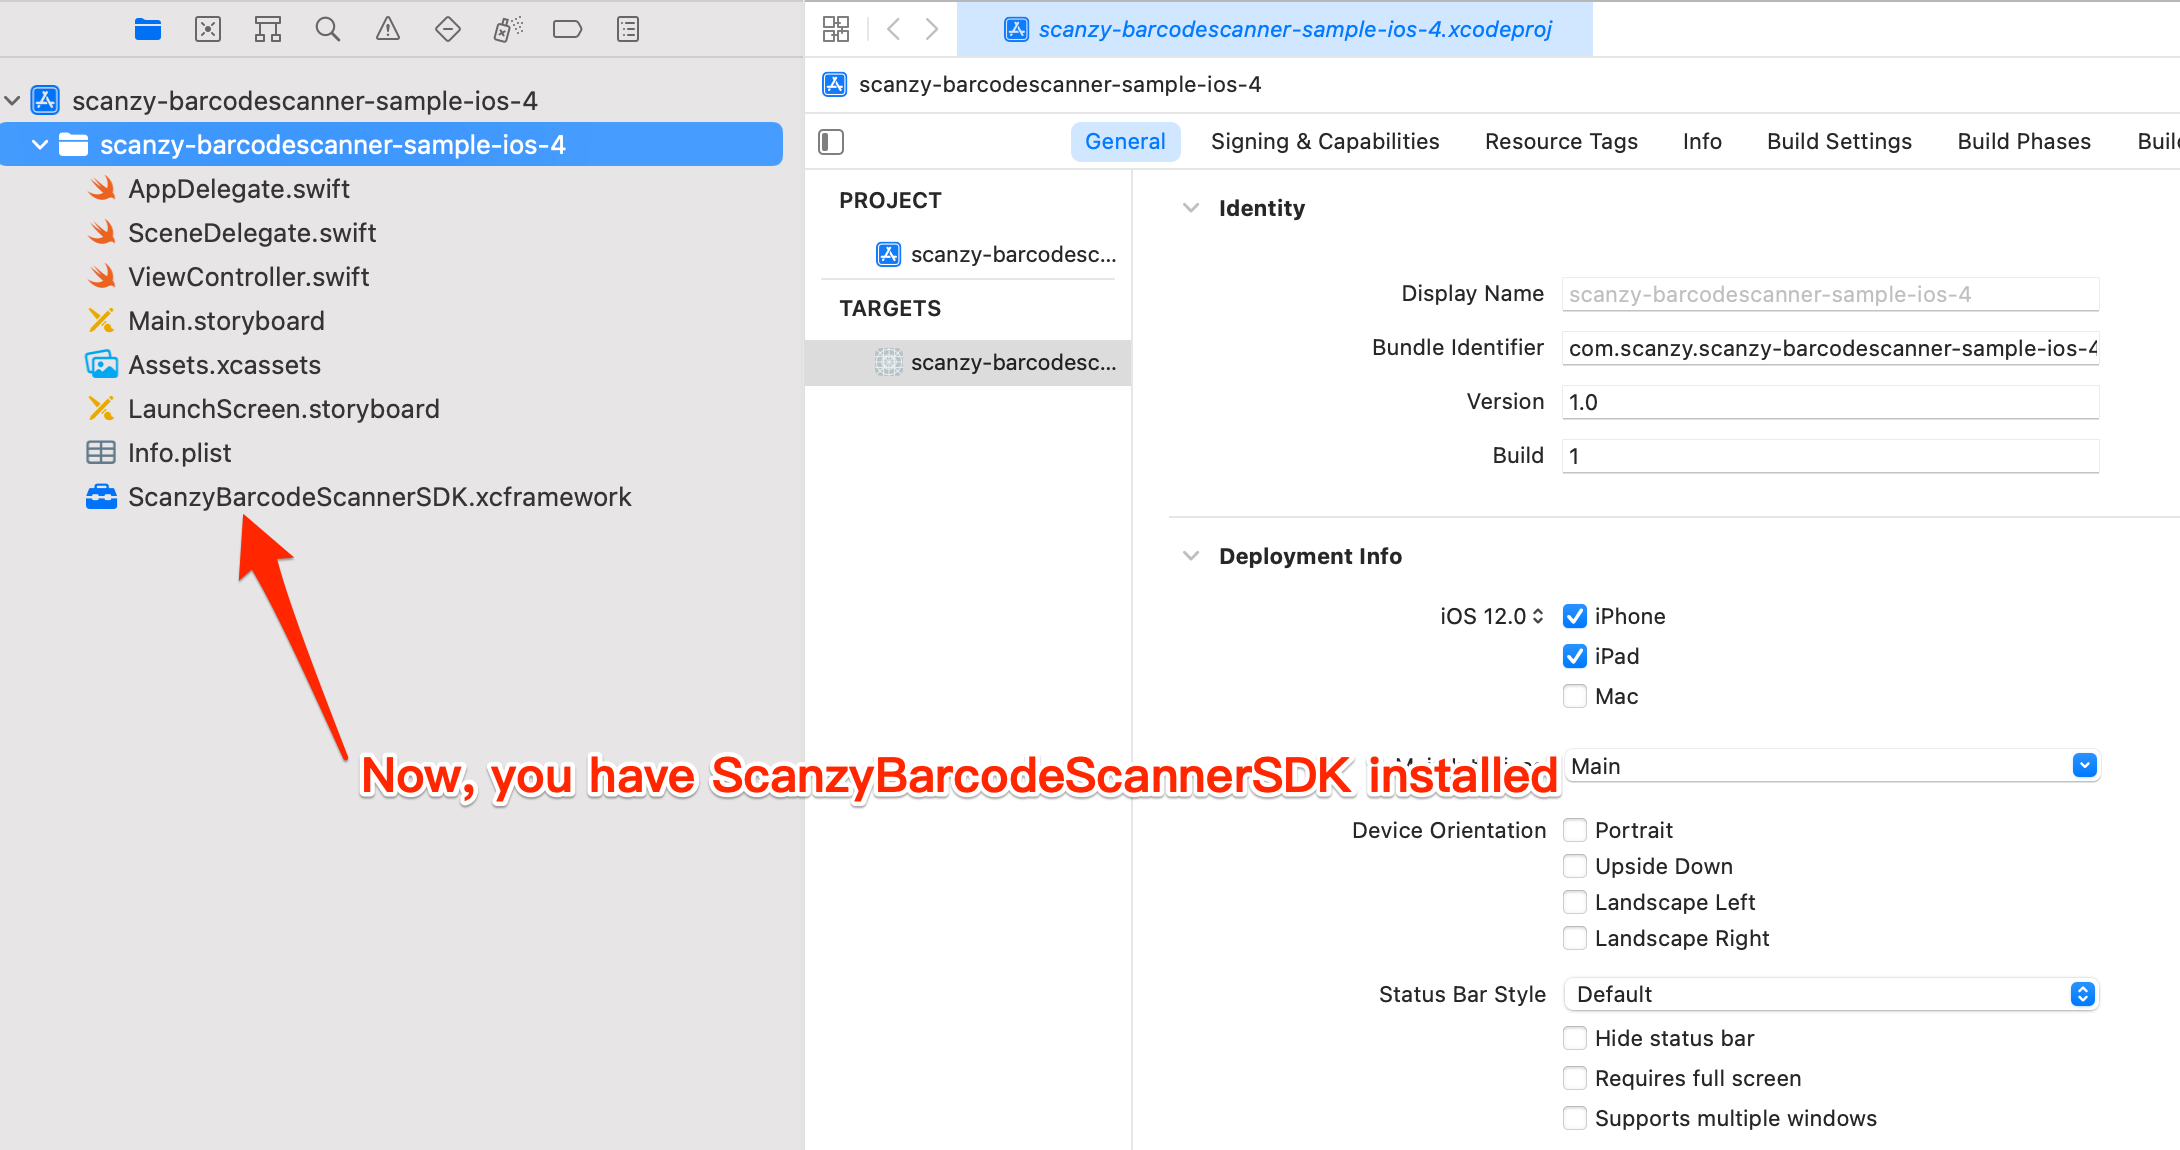
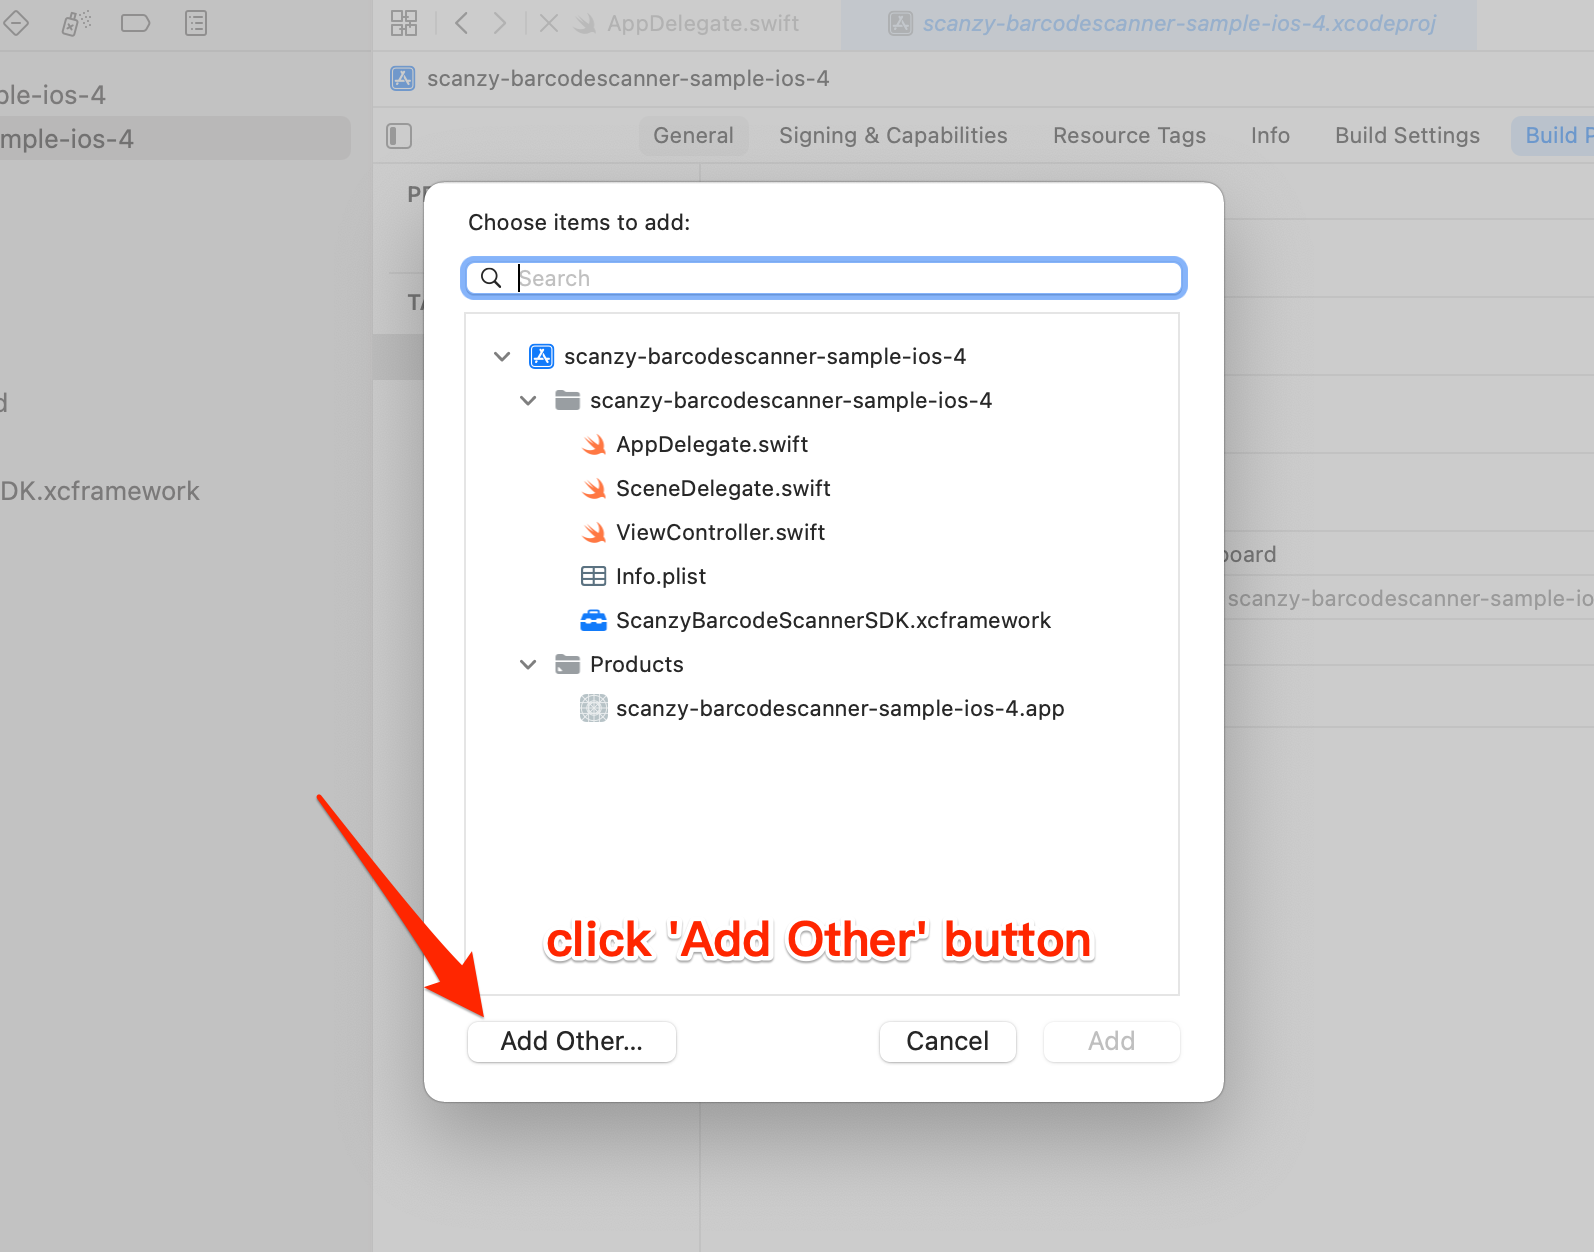
Add ScanzyBarcodeScannerSDK.xcframework to your project:
-
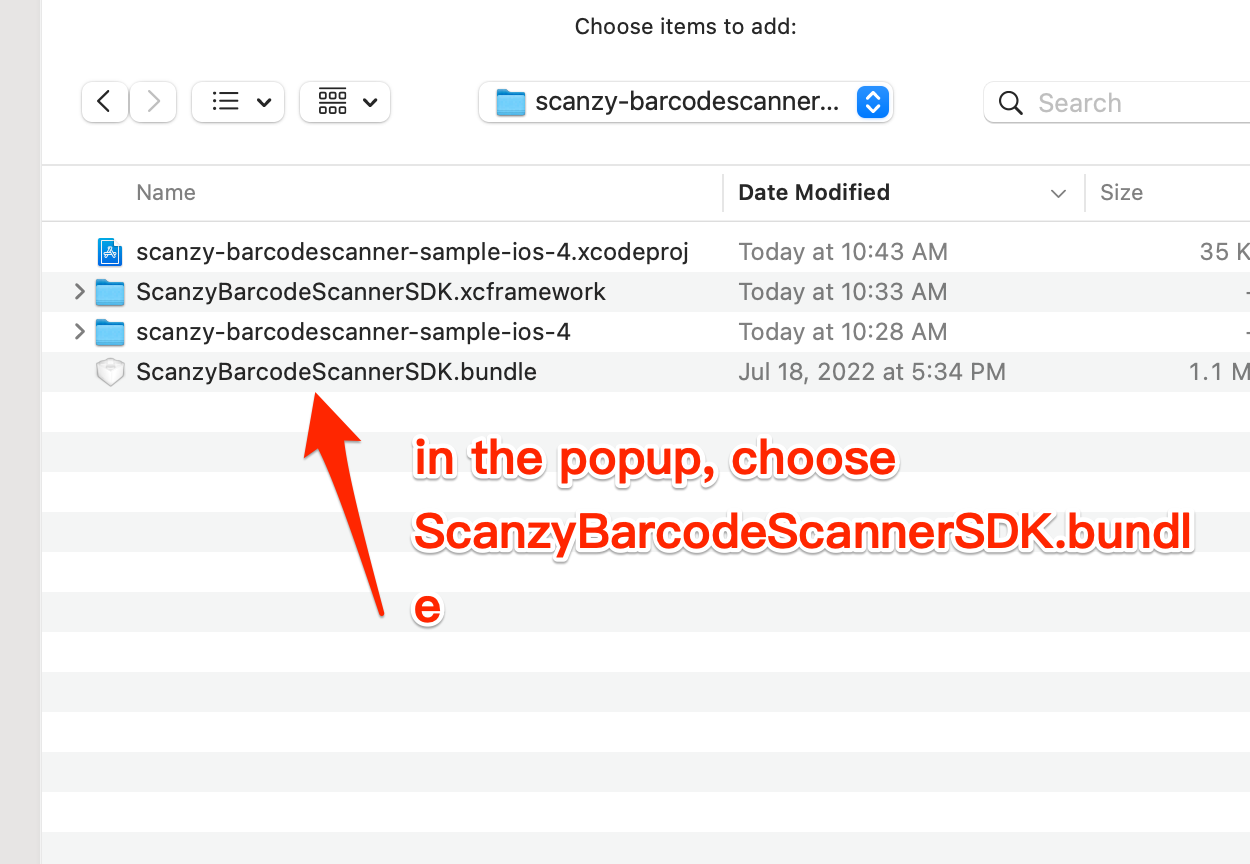
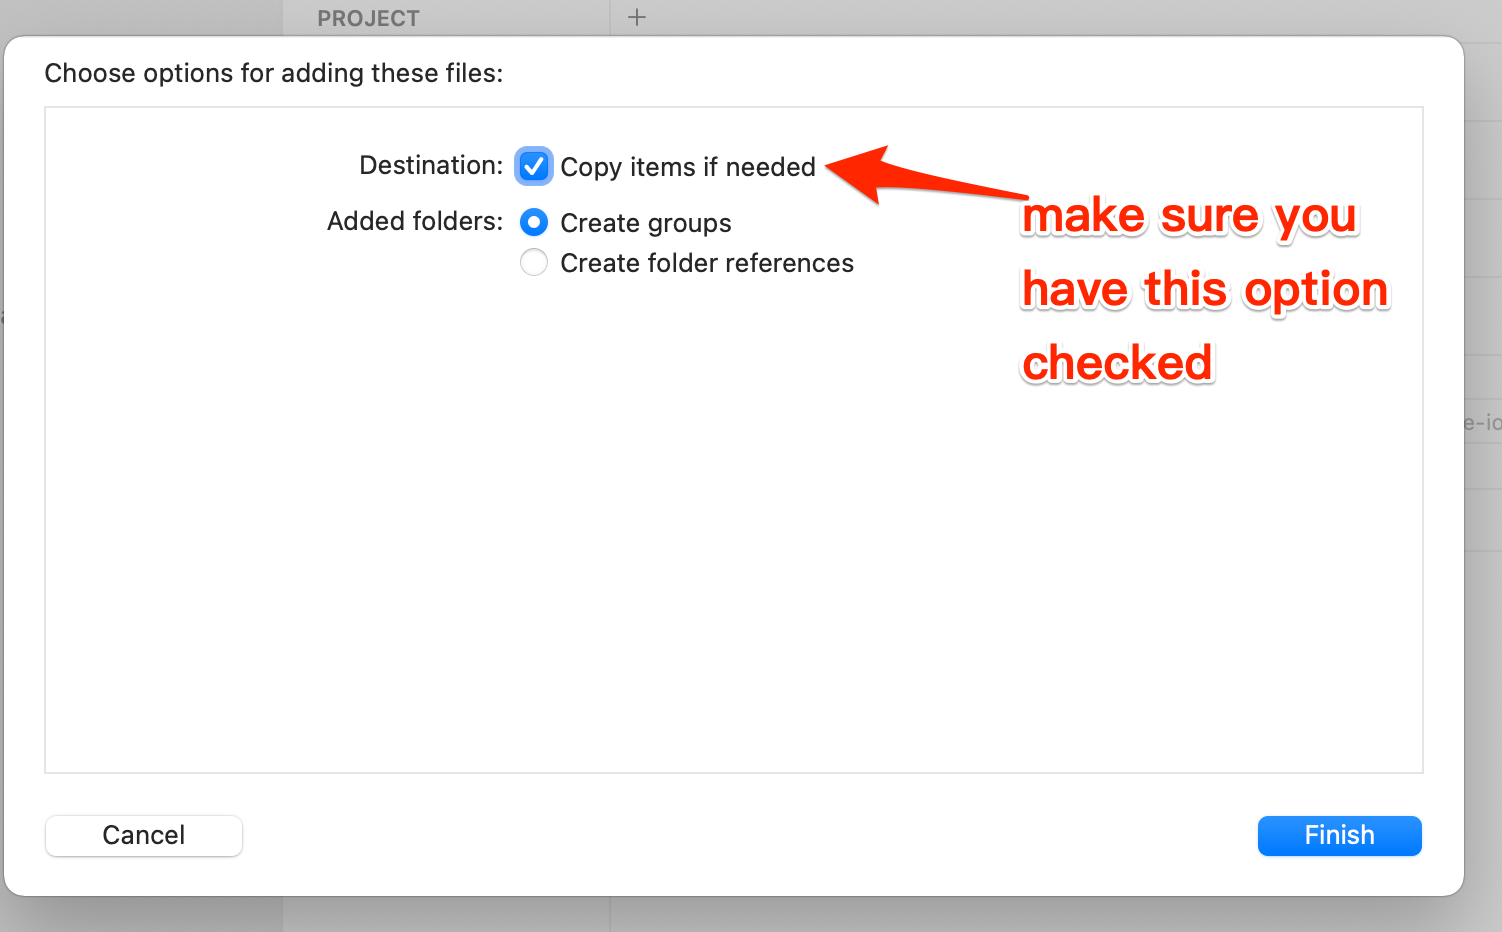
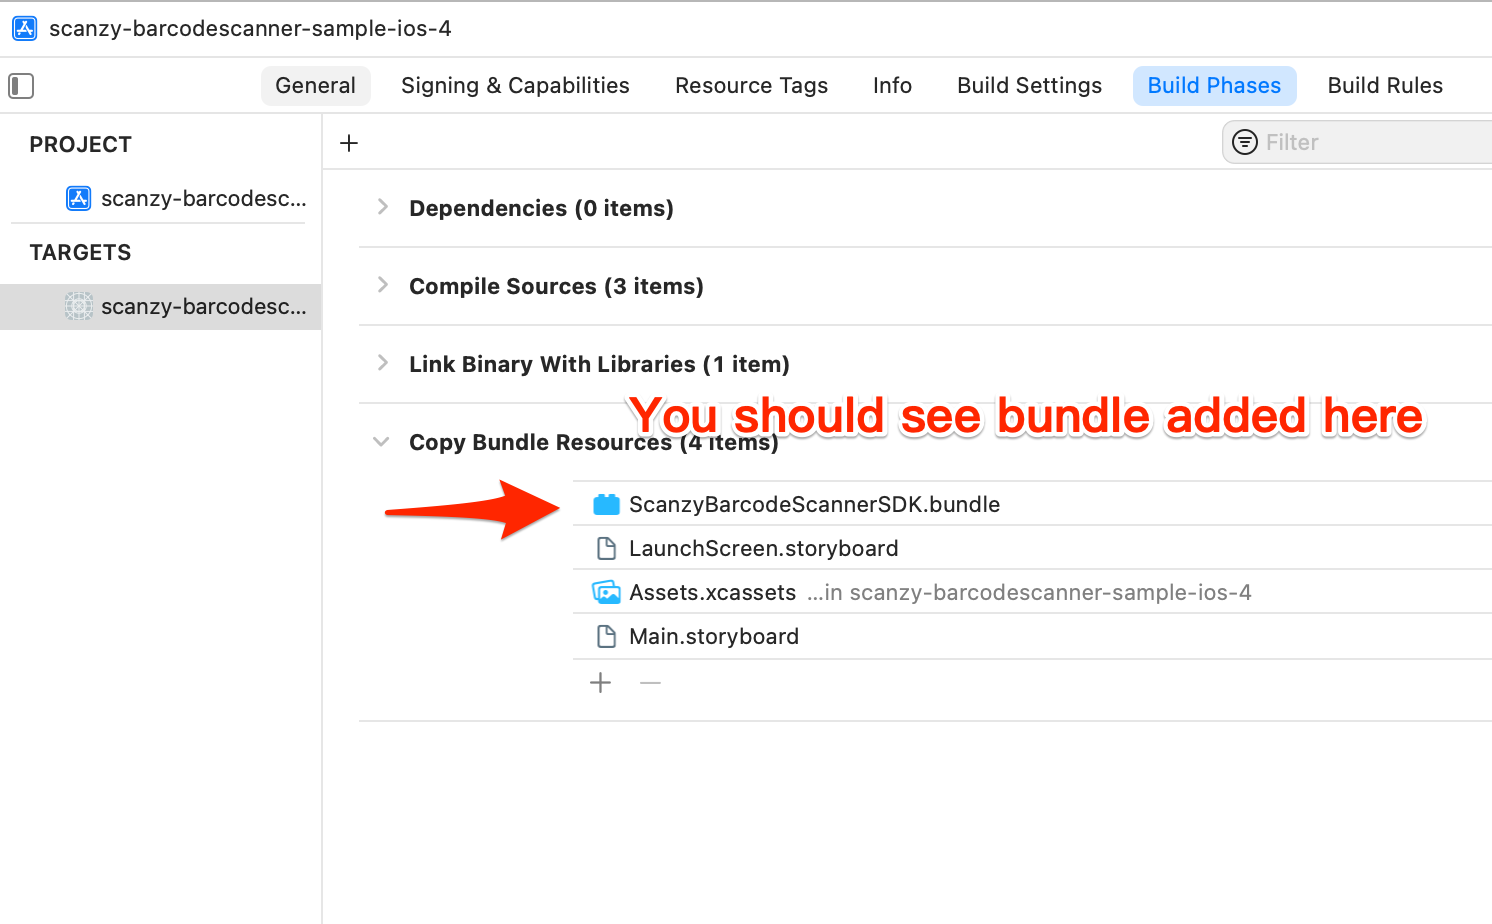
Add ScanzyBarcodeScannerSDK.bundle to your project:
-
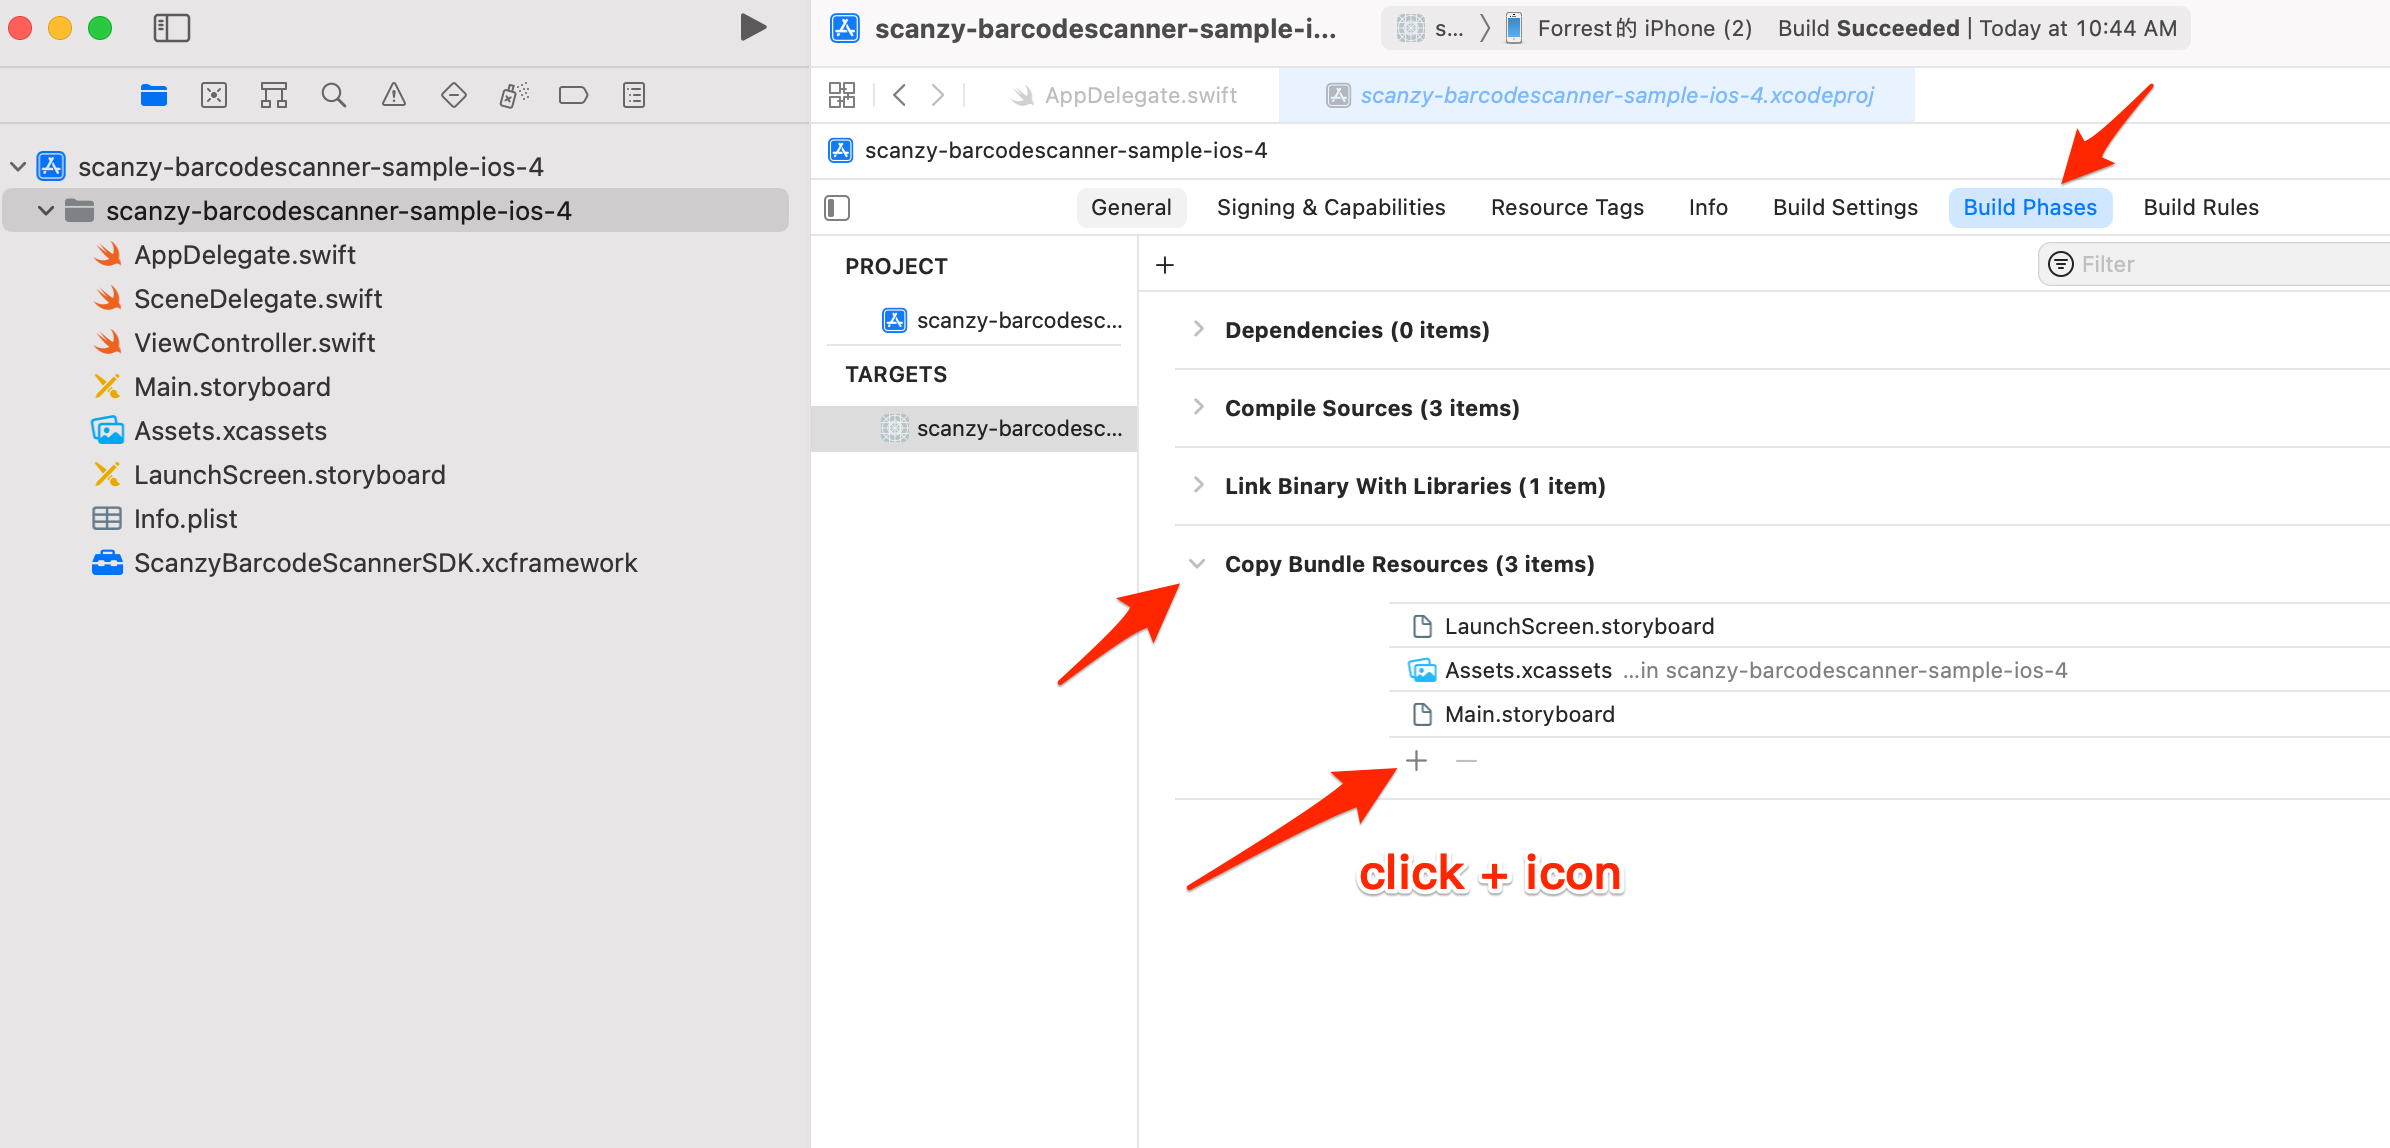
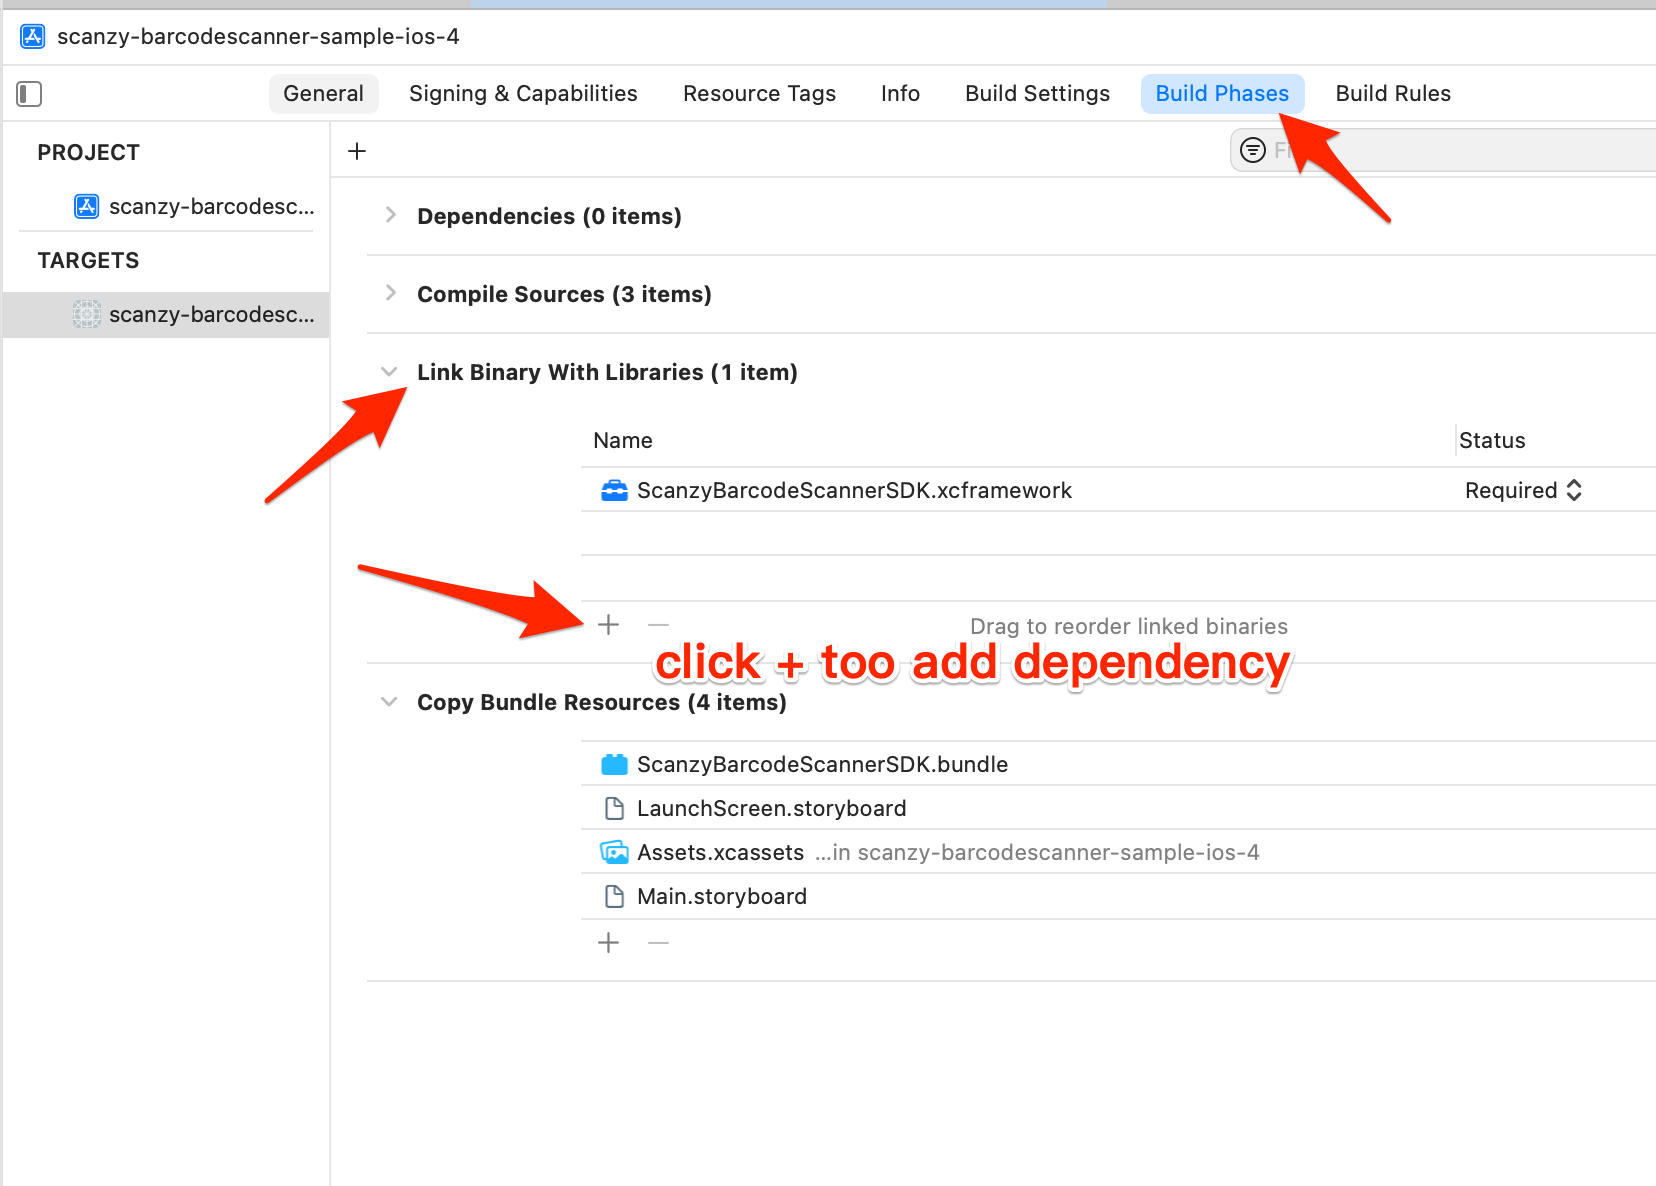
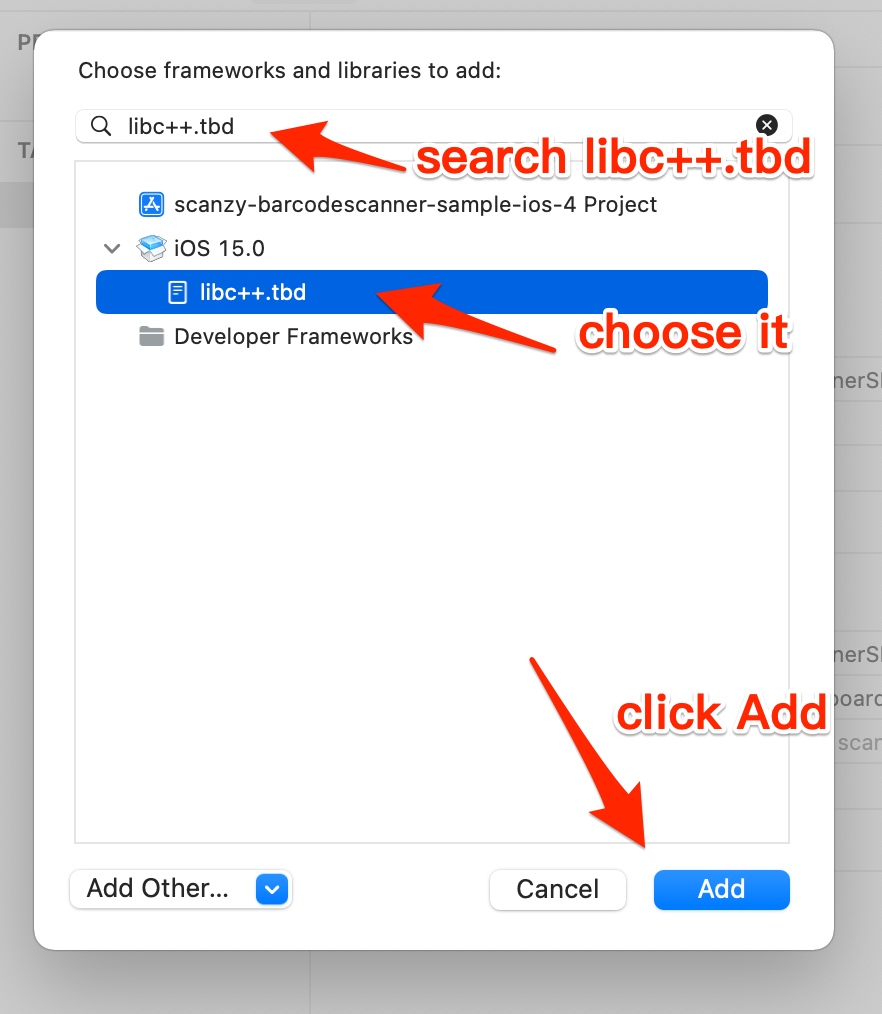
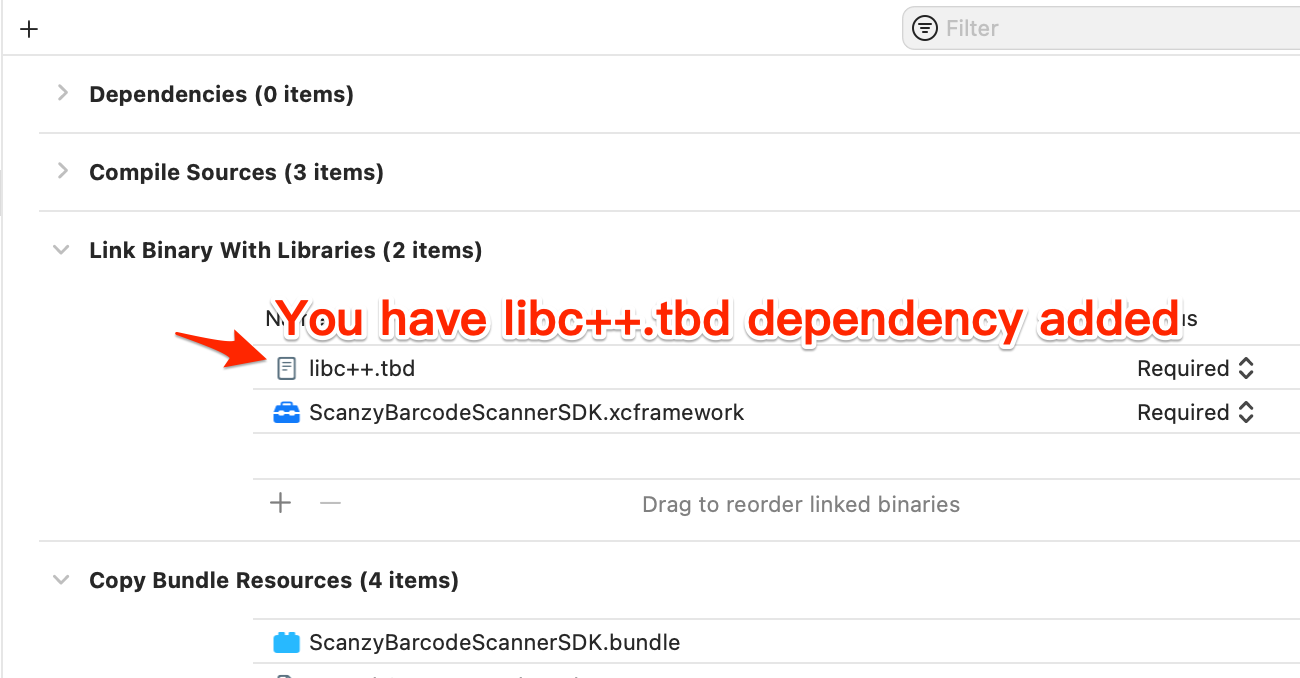
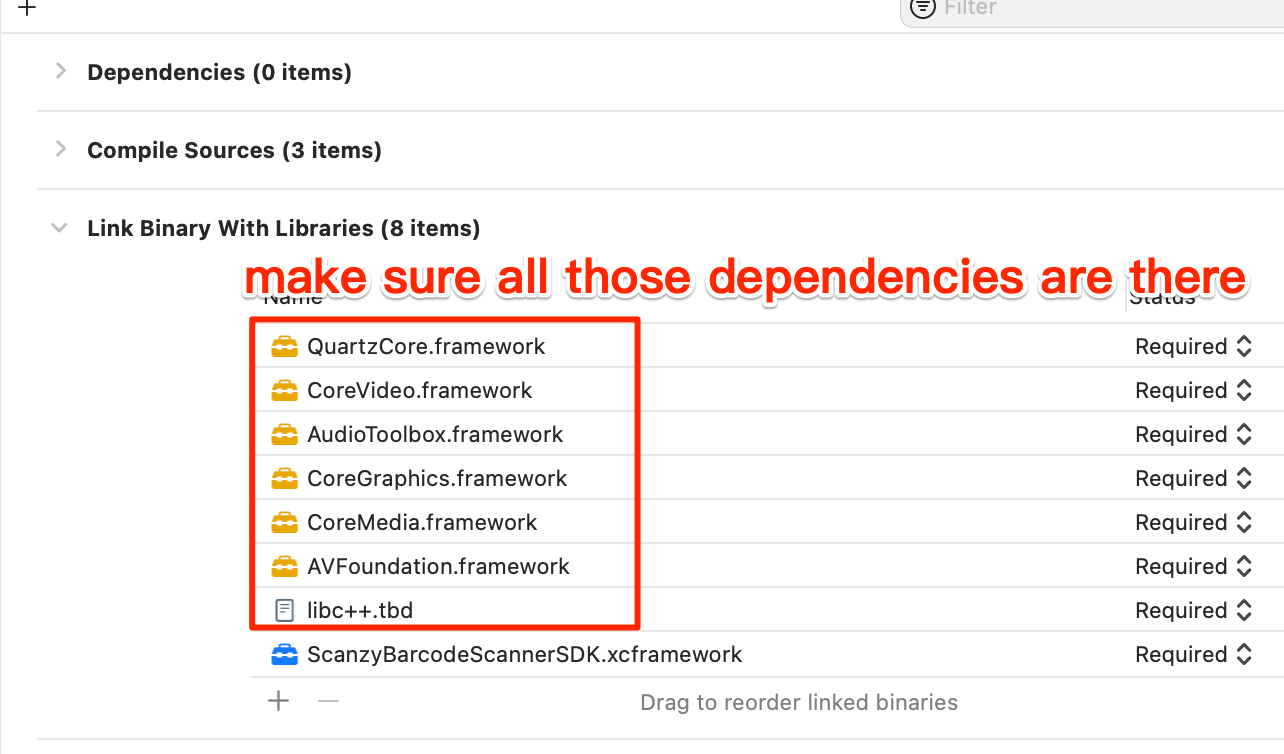
Add the system dependencies libc++.tbd, AVFoundation, CoreMedia, CoreGraphics, AudioToolbox, CoreVideo, QuartzCore to your project (Repeat below steps for each dependency).
Now you have ScanzyBarcodeScannerSDK installed manually!
Quick Starts
Follow below steps to use ScanzyBarcodeScannerSDK in your app.
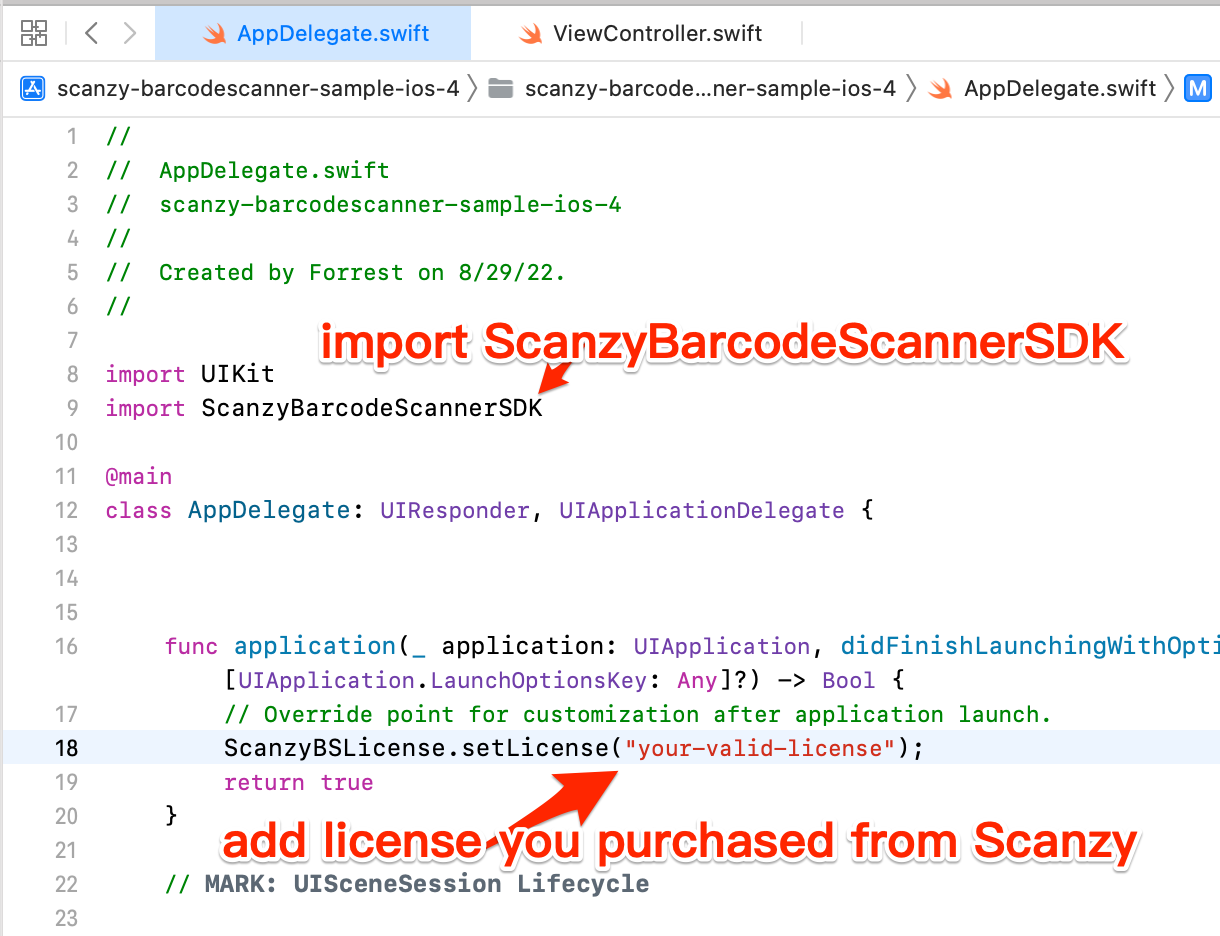
Set license in your app entry point
You can check the complete example code below:
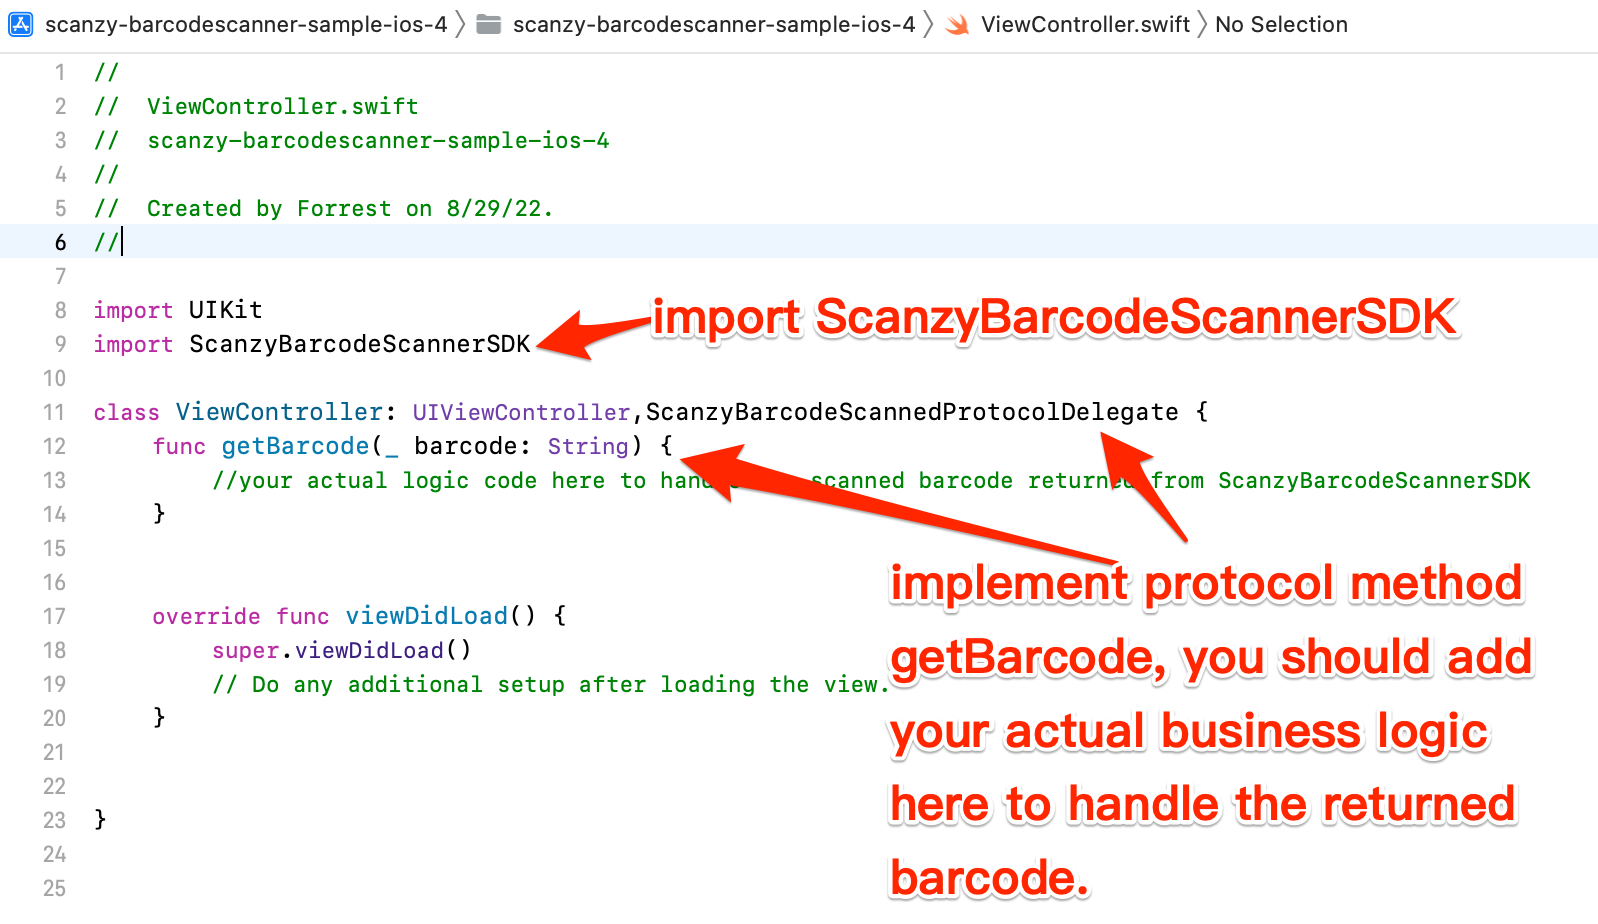
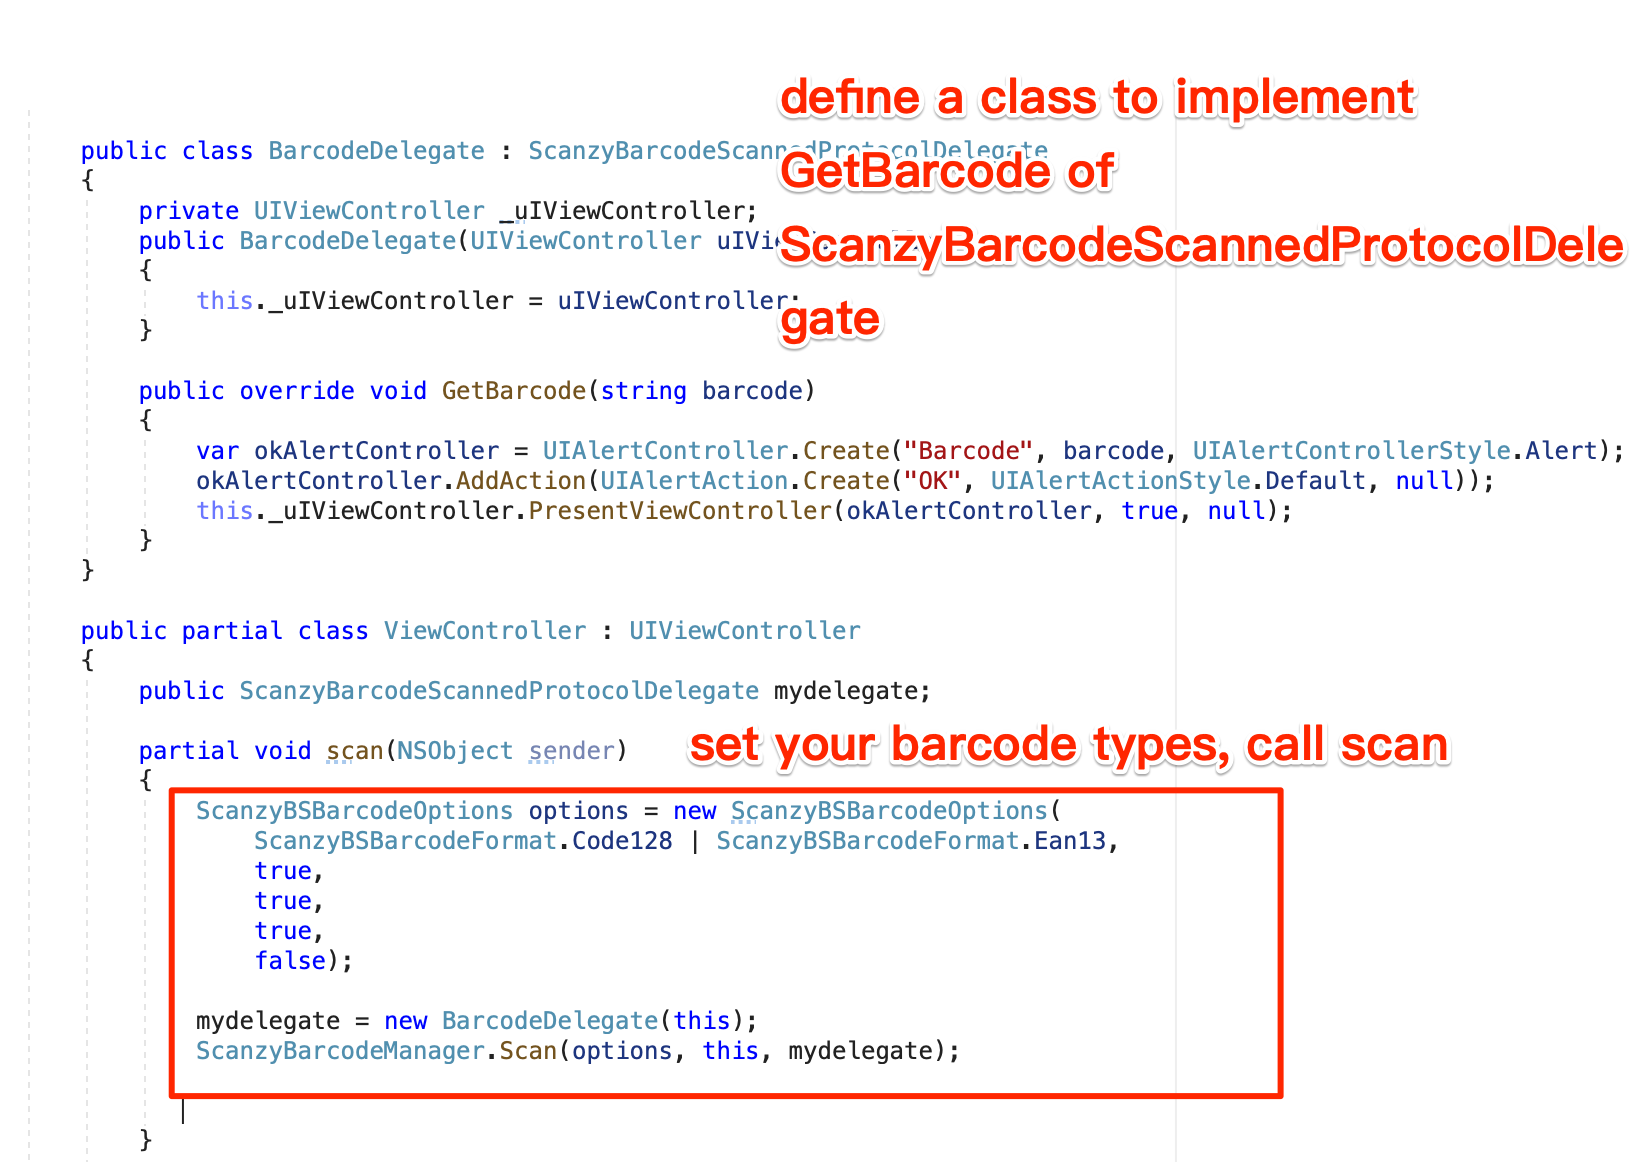
Based on your actual business logic, such as a scan icon button click in a view.
Firstly, implement protocol ScanzyBarcodeScannedProtocolDelegate in your view.
Then, in your actual logic code where you need to scan barcode. such as button click
You can check the example code below:
You can check the complete working sample iOS app on:
Scanzy iOS sample app
Installation
Install via Maven
-
Add maven dependency to your project's gradle.bundle:
    def ScanzyBarcodeScannerSDKVersion = "1.0.0"
    implementation "com.scanzy.ScanzyBarcodeScannerSDK:${ScanzyBarcodeScannerSDKVersion}"
-
Then, Resync your project with gradle.
Install Manually
-
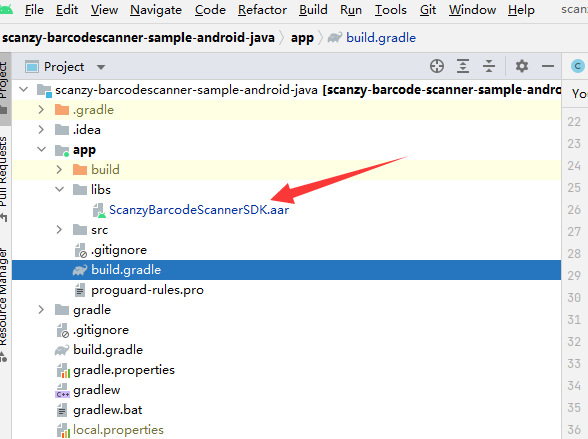
Get ScanzyBarcodeScannerSDK.aar from here.
-
Add ScanzyBarcodeScannerSDK.aar to your project libs folder (app/libs, create it if it doesn't exist)
-
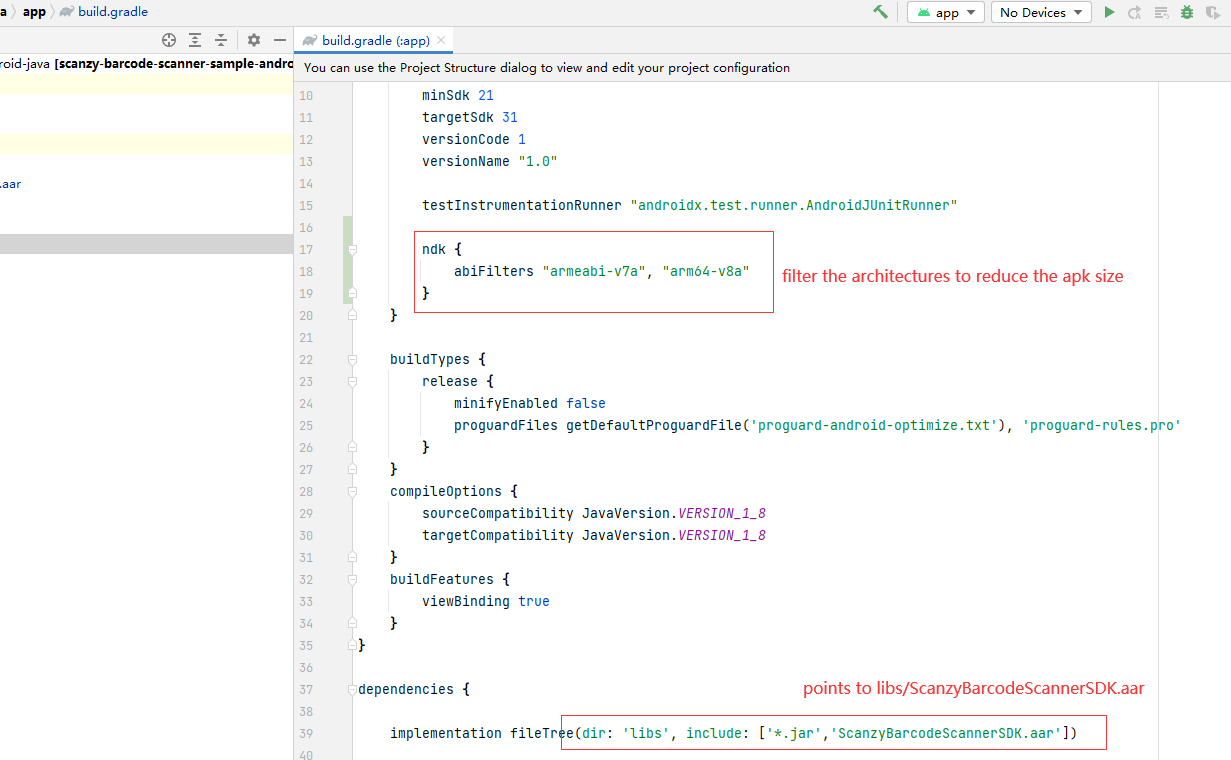
Point to the ScanzyBarcodeScannerSDK.aar in your project:
-
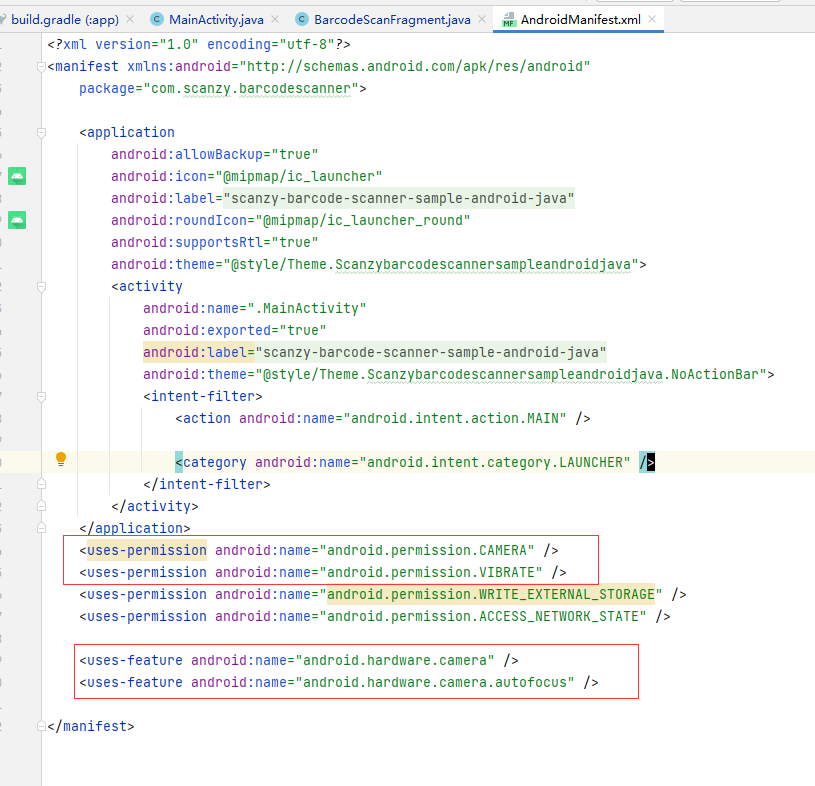
Set permissions in your project AndroidManifest.xml
Now you have ScanzyBarcodeScannerSDK installed!
Quick Starts
Follow below steps to use ScanzyBarcodeScannerSDK in your app.
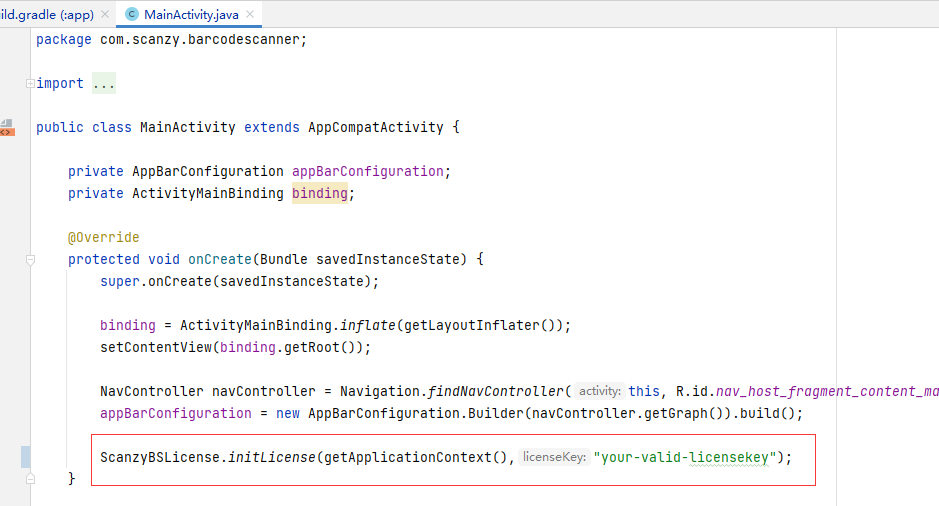
Set license in your app entry point
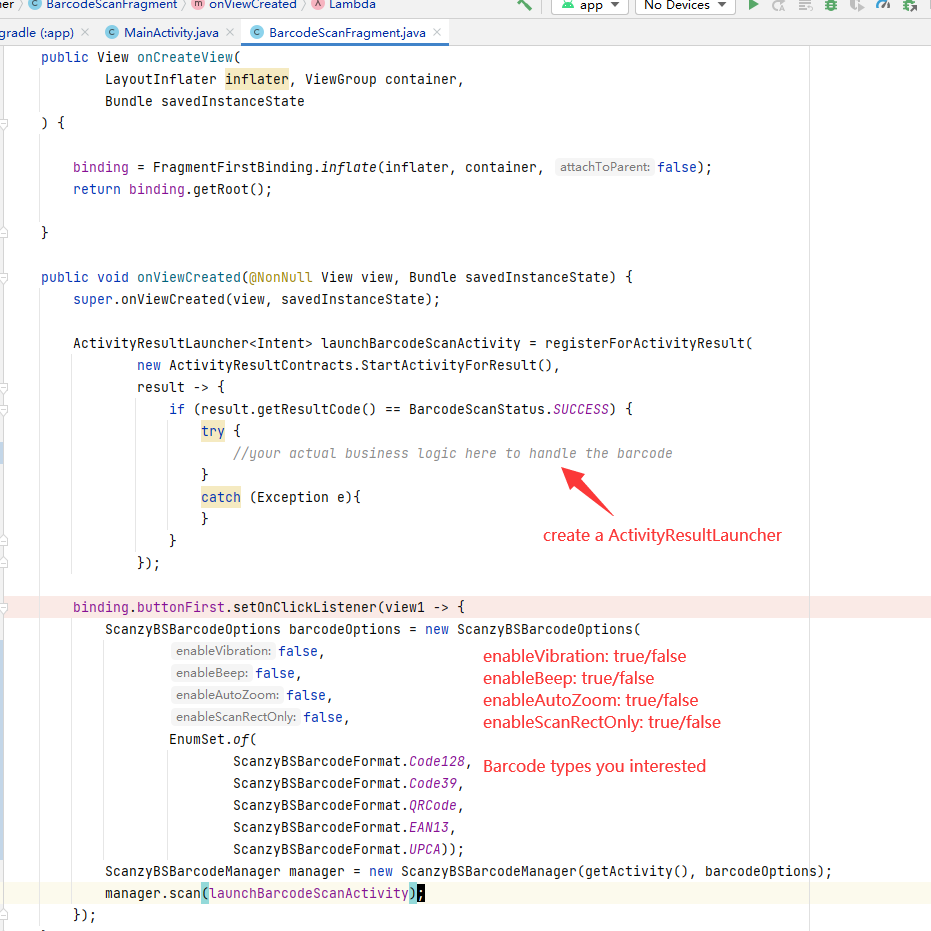
Based on your actual business logic, such as a scan icon button click in a view.
You can check the complete working sample android app on:
Scanzy android sample app
Installation
-
Add plugin to your ionic project:
ionic cordova plugin add cordova-plugin-scanzy-barcodescanner
Quick Starts
Follow below steps to use ScanzyBarcodeScannerSDK in your Ionic app.
Set license
Firstly, set the license, it's better to do it in your app's startup, although it's fine to call this function every single time to scan the barcode.
ScanzyBarcodeScanner.setLicense("your-valid-licensekey");
Then, insert below code snippet into the place to scan barcode:
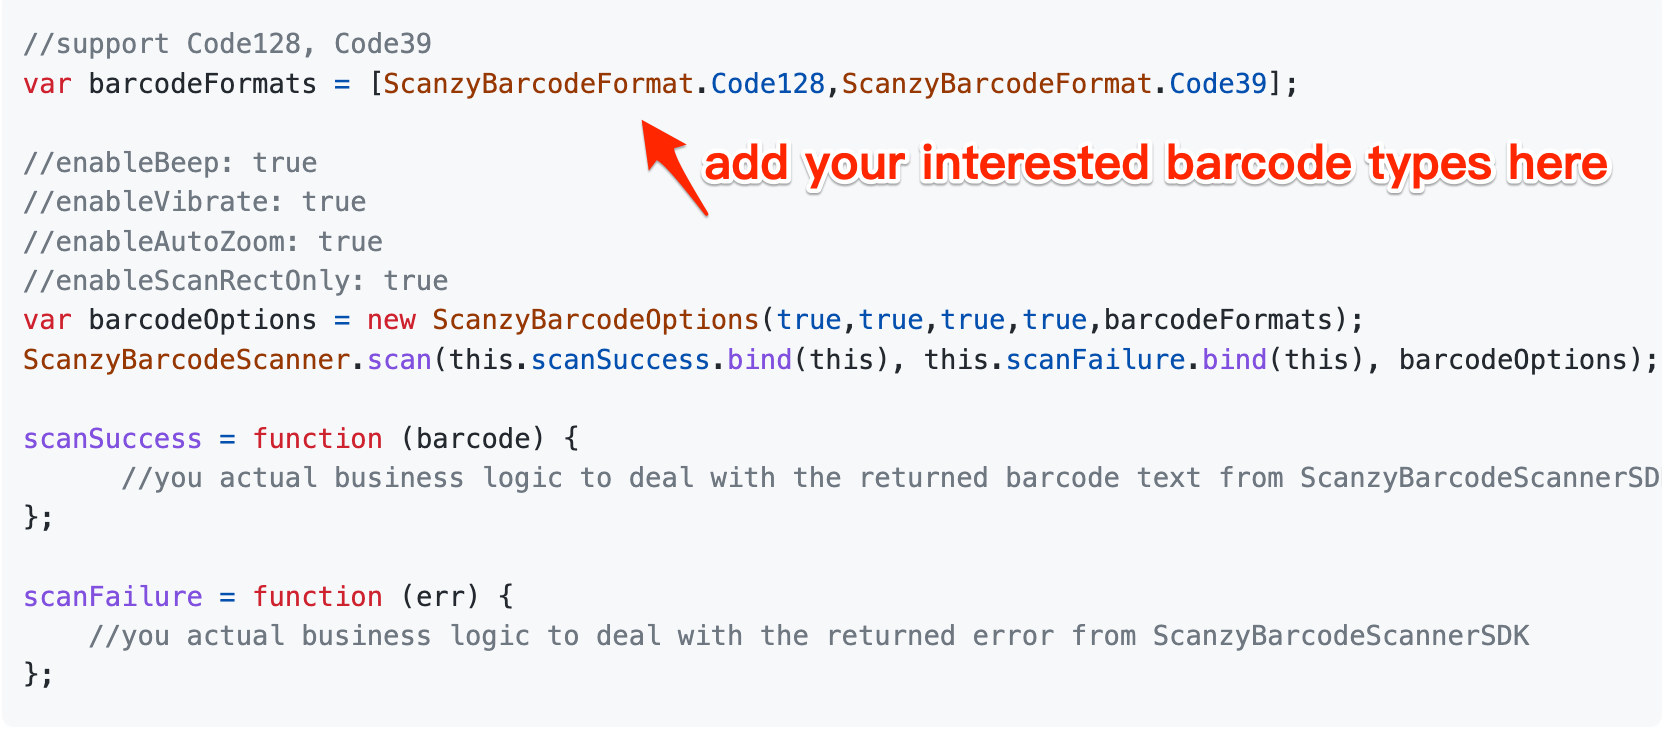
You can check the example code below:
You can check the complete working sample Ionic app on:
Scanzy Ionic sample app
Installation
-
Add scanzy_barcodescanner plugin to your project's pubspec.yaml:
                                dependencies:
                                    scanzy_barcodescanner: ^1.0.0
Then, run flutter command
flutter pub get
-
for iOS:
Go to your Flutter project's ios folder, run:
pod install
In your Info.plist file, add the required permission
NSCameraUsageDescription with your description why you want to access the camera.
-
for Android
Add the CAMERA permission to your app's AndroidManifest.xml
Quick Starts
Follow below steps to use ScanzyBarcodeScannerSDK in your Ionic app.
To use this plugin, in your project, such as lib/main.dart, import the necessary packages:
Set license
Firstly, set the license, it's better to do it in your app's startup, although it's fine to call this function every single time to scan the barcode.
ScanzyBarcodeScanner.setLicense("your-valid-licensekey");
Then, insert below code snippet into the place to scan barcode:
You can check the example code below:
You can check the complete working sample Flutter app on:
Scanzy Flutter sample app
Installation
-
Add plugin to your React Native project:
npm install react-native-scanzy-barcode-scanner-plugin
IOS Setup
-
Install CocoaPods dependencies:
cd ios && pod install
-
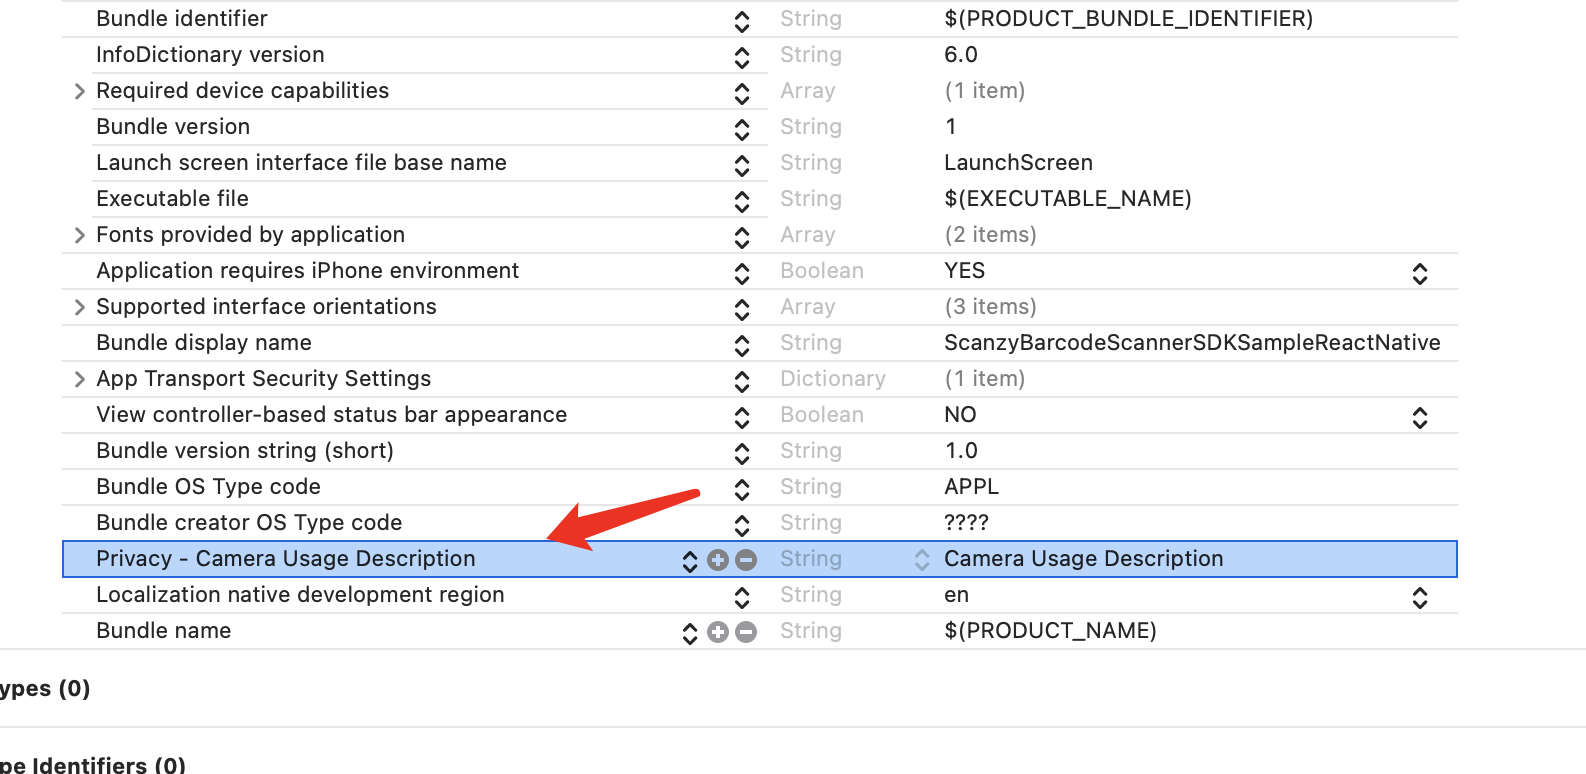
In order to get camera permission, please add below configs to the Info.plist of the Project Targets.
Android Setup
-
Add the following config in the same build.gradle(Android/app/build.gradle) file to avoid conflicts with the lib filename libc++_shared.so, which is used by React Native as well as by many other 3rd-party modules:
android {
    ...
    packagingOptions {
        pickFirst '**/libc++_shared.so'
    }
}
-
Sync Project with Gradle files to install all the dependencies.
Quick Starts
Follow below steps to use ScanzyBarcodeScannerSDK in your React Native app.
Set license
Firstly, set the license, it's better to do it in your app's startup, although it's fine to call this function every single time to scan the barcode.
ScanzyBarcodeScannerPlugin.setLicense('YOUR LICENSE KEY');
Then, insert below code snippet into the place to scan barcode:
//set scan formats and options
const formats = [ScanzyBarcodeFormat.Code128, ScanzyBarcodeFormat.Code93, ScanzyBarcodeFormat.EAN13, ScanzyBarcodeFormat.QRCode];
const options: ScanzyBarcodeOptions = {
    enableBeep: true,
    enableVibration: true,
    autoZoom: true,
    scanCropRectOnly: true,
    formats: formats
}

// scan
ScanzyBarcodeScannerPlugin.scan(options).then((data : string)=>{
    console.log('Scan Result:' + data)
})
You can check the example code below:
You can check the complete working sample React Native app on:
Scanzy React Native sample app
Installation
Install via Nuget
-
nuget install ScanzyBarcodeScannerSDK.Xamarin
Install Manually
-
Get ScanzyBarcodeScannerSDK.Xamarin.dll from here.
-
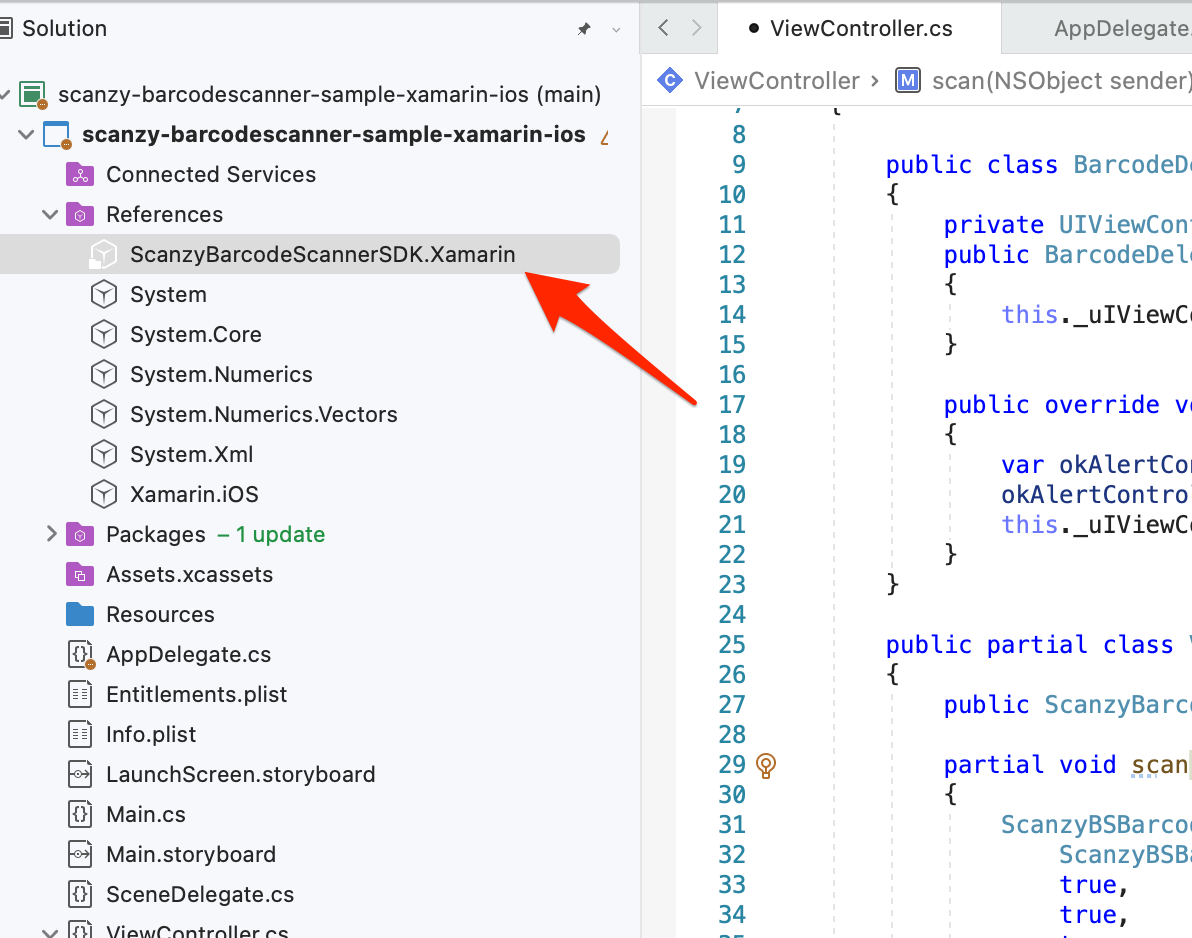
Add ScanzyBarcodeScannerSDK.dll reference. (iOS)
-
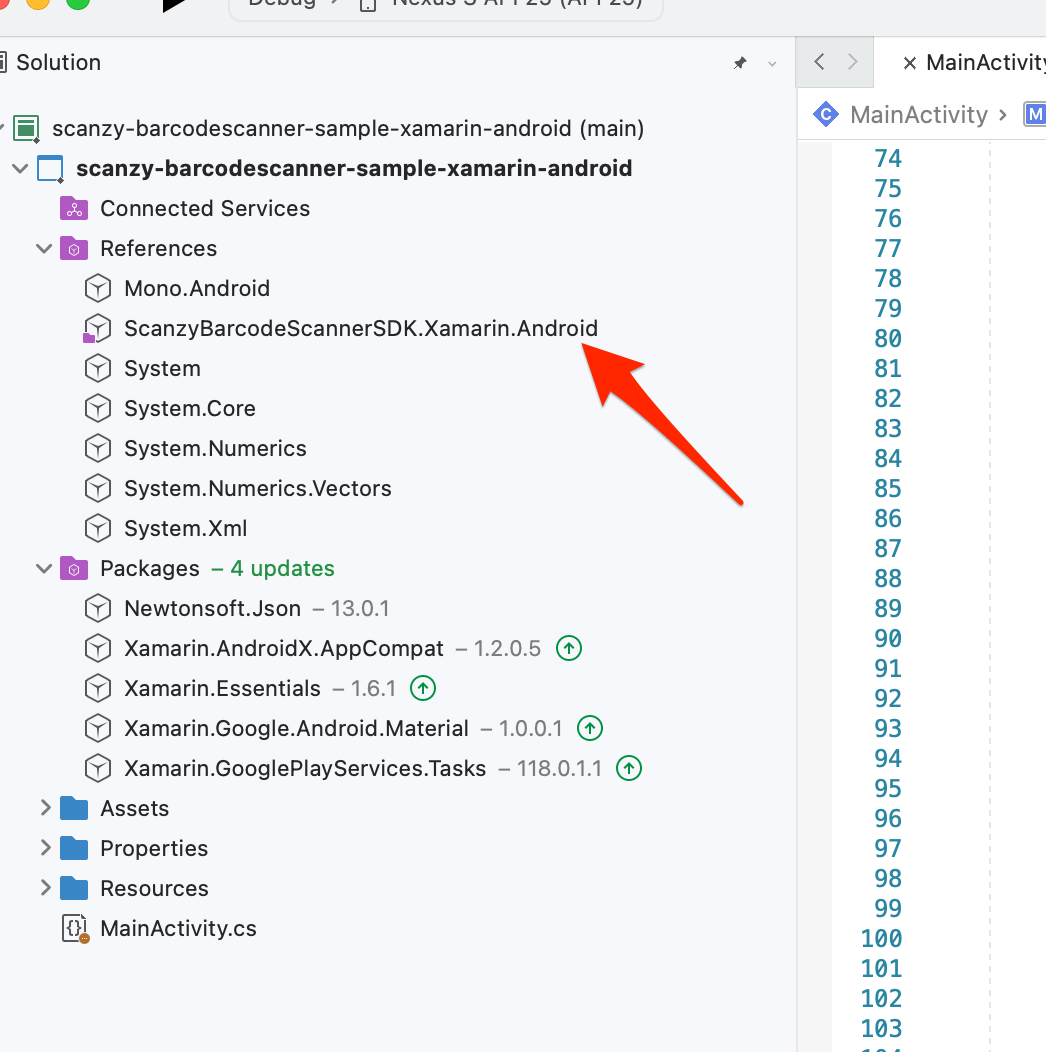
Add ScanzyBarcodeScannerSDK.dll reference. (android)
Now you have ScanzyBarcodeScannerSDK installed!
Quick Starts
Follow below steps to use ScanzyBarcodeScannerSDK in your Xamarin iOS app.
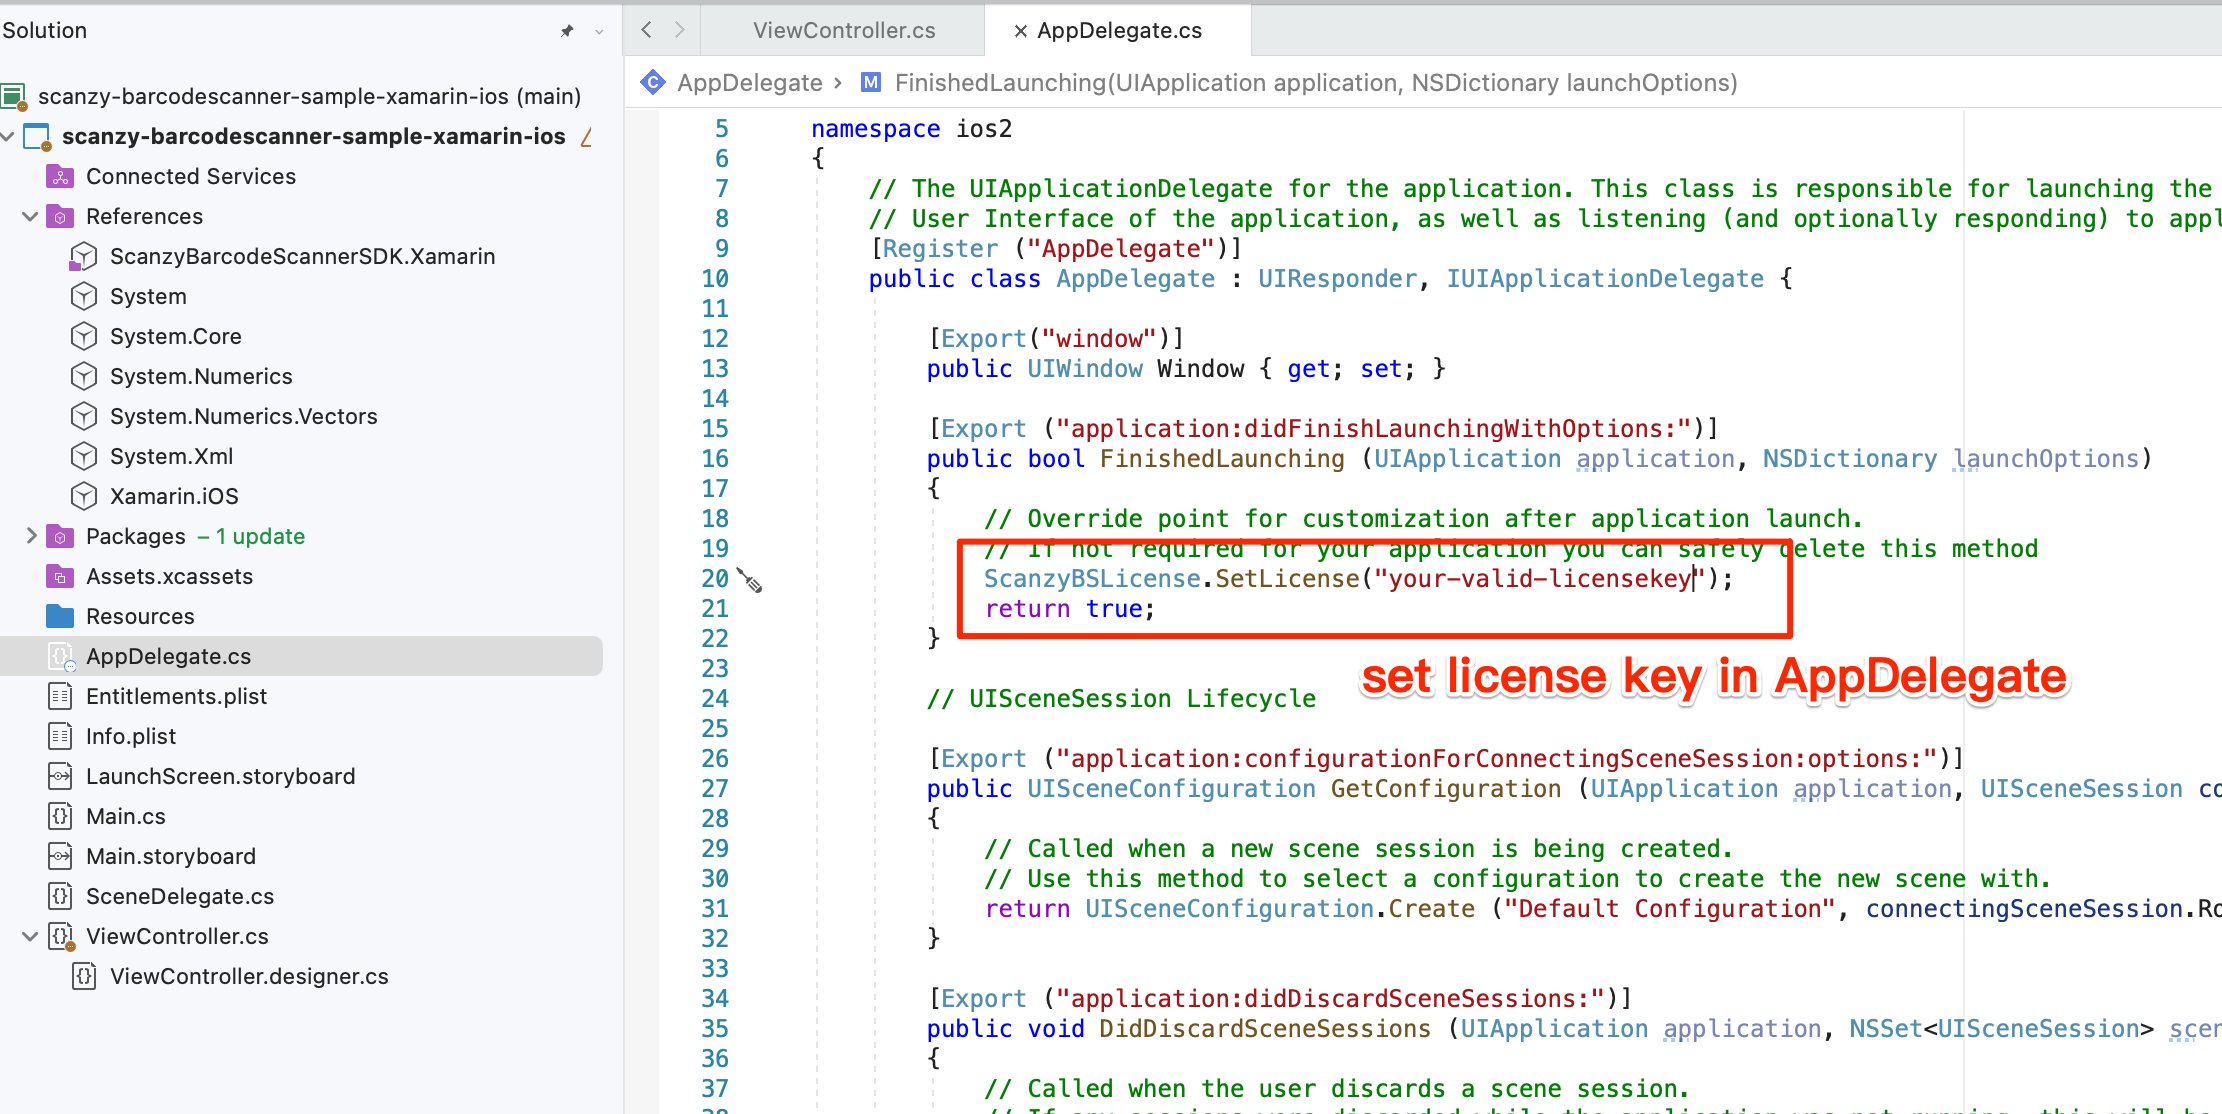
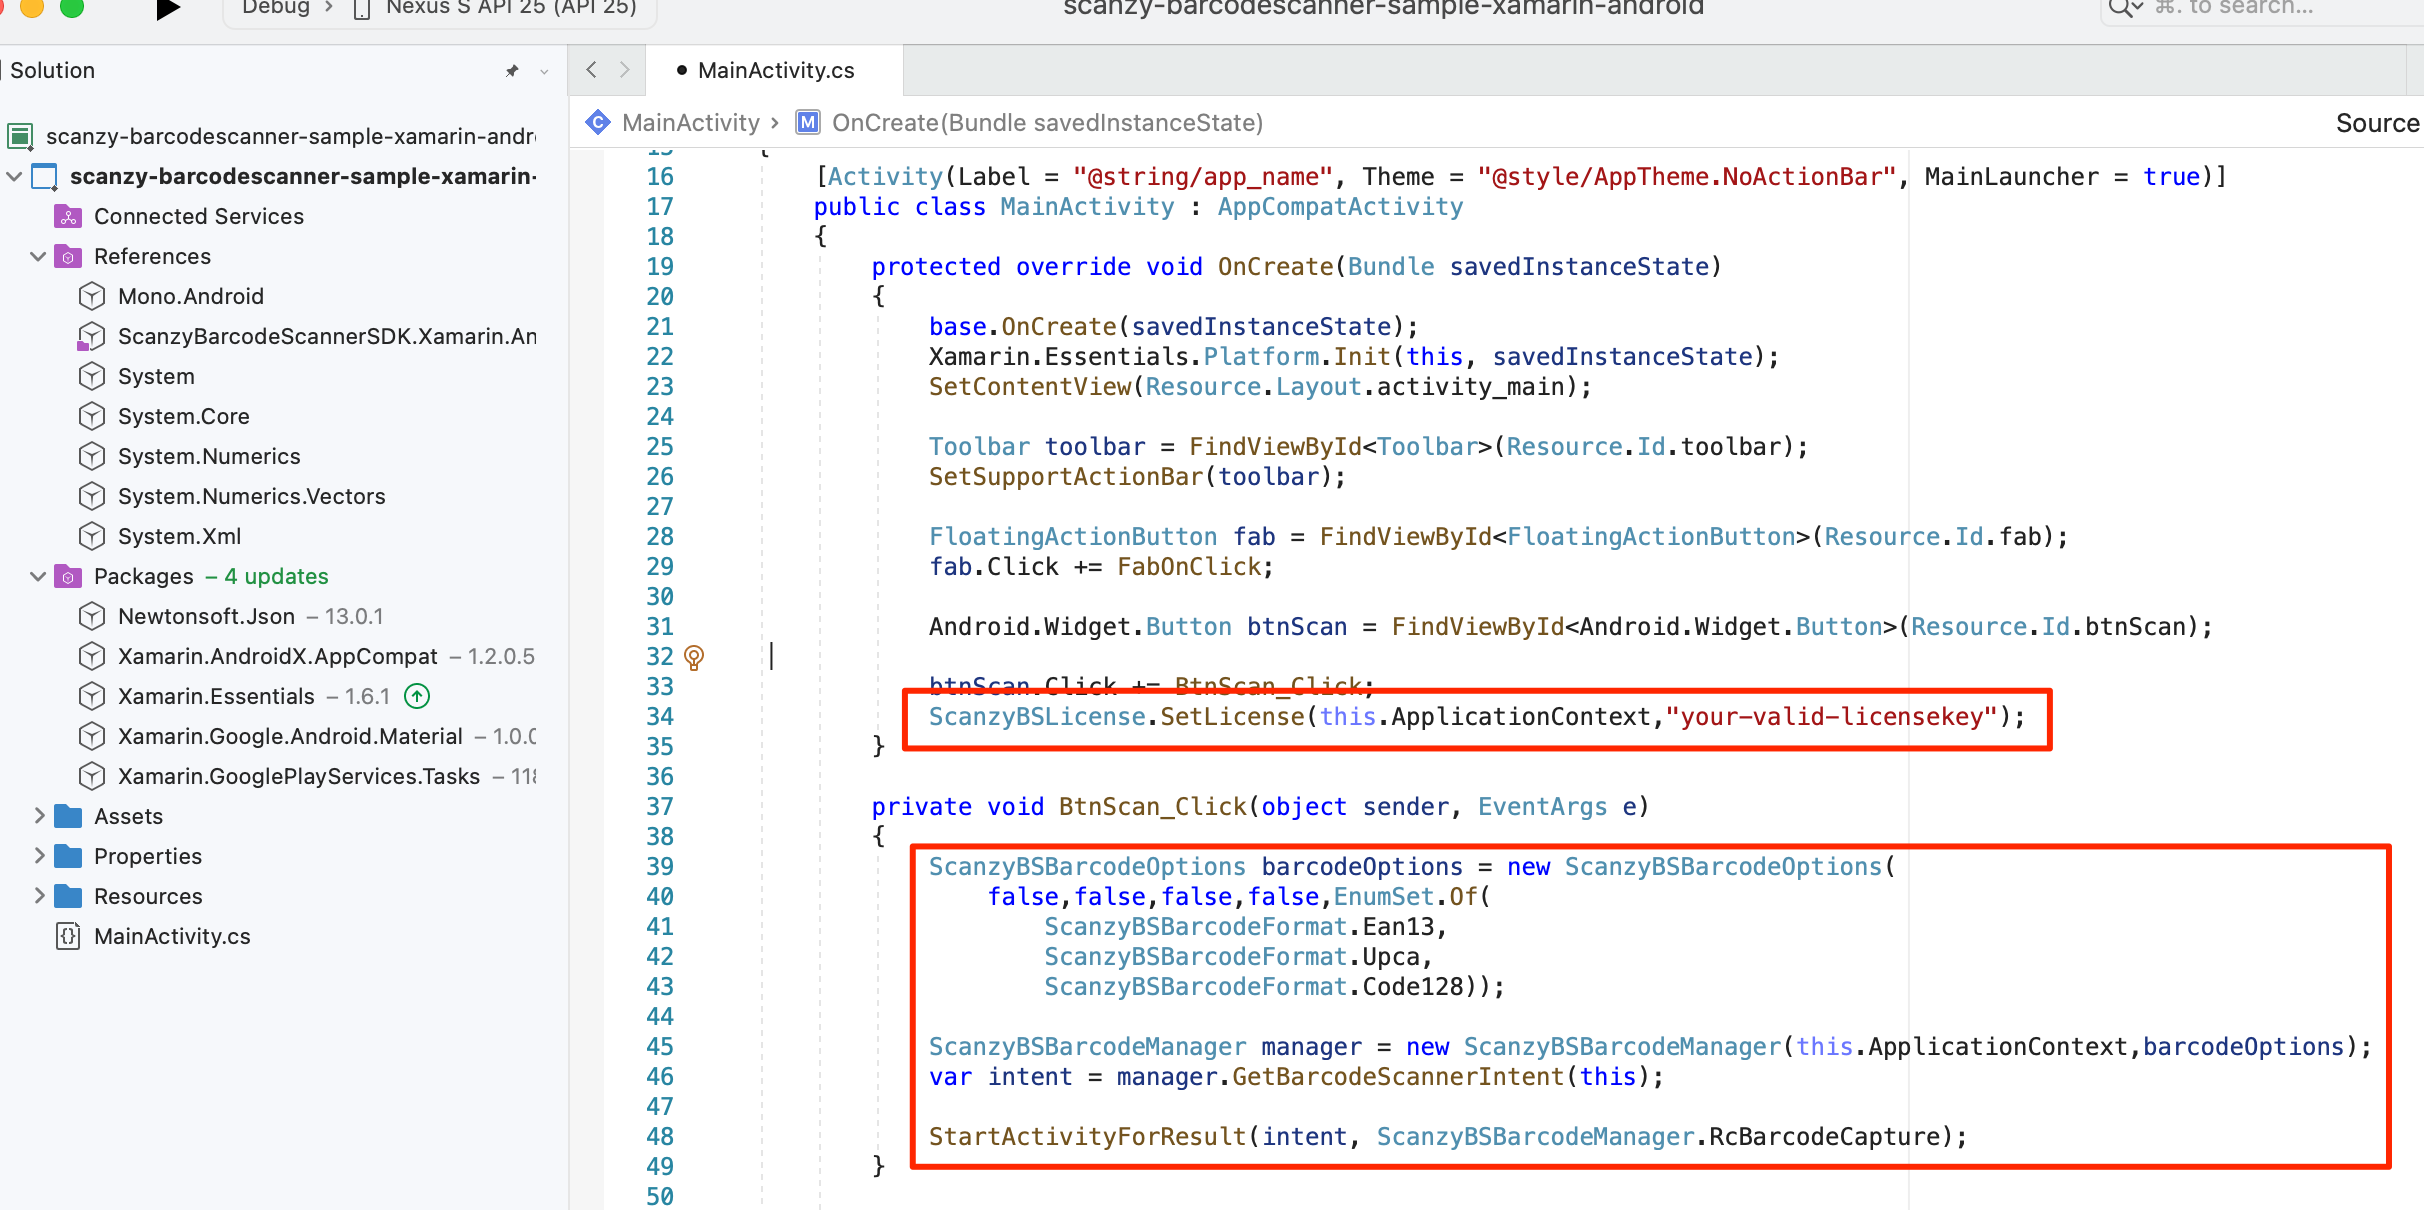
Set license in your app entry point
Based on your actual business logic, such as a scan icon button click in a view.
Follow below steps to use ScanzyBarcodeScannerSDK in your Xamarin Android app.
Set license in your app entry point
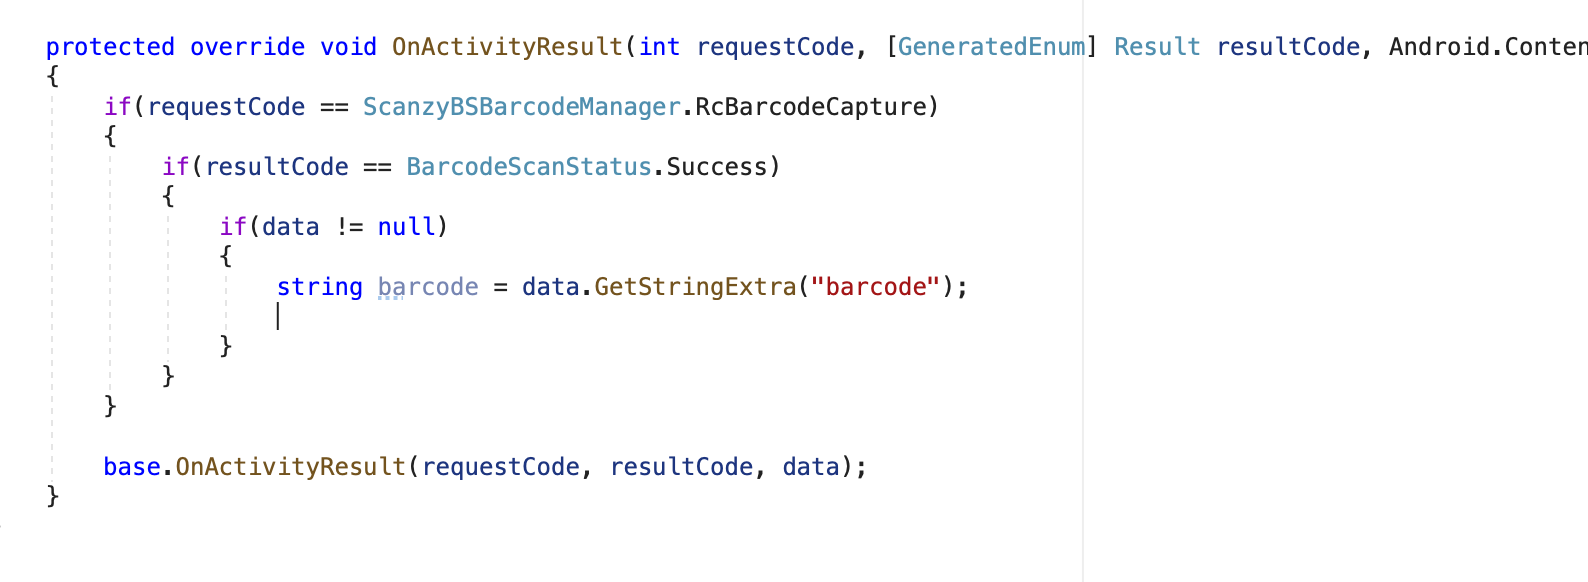
Based on your actual business logic, such as a scan icon button click in a view.
You can check the complete working sample android app on:
Scanzy Xamarin sample app

